Before you can set up and list individual items through the eBay module, you need to check your eBay categories and eBay shipping templates.
Please note that use of the eBay integration requires some setup from a member of the Citrus-Lime team. If you are unsure if your integration is active or not, navigate to Marketplace Tools > eBay Management in Cloud MT, and look at the 'Module Active' tick box. If this is checked, you are ready to start using the eBay integration. If it is not, please refer to the following article: What are the first steps to getting set up on the eBay integration?
It is important to note that if you have existing eBay listings which were generated independent of the Citrus-Lime eBay integration, you will need to manually end those listings. The integration will not interact with pre-existing eBay listings, only listings that were originally made via Cloud MT.
Importing eBay Categories
You can set up your eBay Categories under Marketplace Tools > eBay Import Categories in Cloud MT.
This grid provides a list of all the available eBay categories. In order to list a product under a particular category, the category will first need to be imported into your Citrus Store. Choosing the right eBay category will help you to reach potential customers, so try to choose as accurately as you can.
Search for the categories you need, and click the 'Add to CitrusStore' button in the far right column.

If you would like to view the categories you have already imported, filter the 'In CitrusStore?' column to 'true'.
Once you have started listing on eBay, it is worth noting that eBay sometimes make changes to their category structure. If this happens, and any of your current categories are affected, you will see a warning in red text on your Cloud MT dashboard:

Follow the blue link to 'View Invalid eBay Categories'. Clicking on the count value next to each invalid category will show you the affected products. To fix these, you can use the 'Update Categories' button on the eBay Import Categories page. This matches your eBay category list to eBay's up-to-date structure.

We have further guidance on managing your eBay categories here.
Managing your eBay shipping templates
eBay items do not use the shipping settings from your Courier Integration Module. For this reason, you have separate eBay shipping templates in Cloud MT. Each product that you want to list on eBay has to be assigned to an eBay shipping template. By default, your products are listed under the Default Template, which is created for you when you start using the integration.
Navigate to Marketplace Tools > eBay Templates to view and change your eBay shipping settings.
As standard, you will find the Default Template here. To view template settings, click 'Edit'. You can then set the delivery costs for that template.

You can use the 'Up to Value' to offer different shipping charges for different value products. Click 'Edit' on the left to make changes to each row (you cannot type directly into the table). Each service has two settings - an active status and then a price.
Let's take a look at how the example shown above would work.
- Customers purchasing items costing up to £10.00 would be offered either 1st Class or 2nd Class delivery. 1st Class would cost them £4.50, and 2nd Class would cost them £2.00.
- Customers purchasing items that cost more than £10.00, but less than £9999, would also be offered either 1st Class or 2nd Class delivery. Here, 1st class would still cost them £4.50, but 2nd Class would be free.
- You do not have to use all the available columns. In the example above, I am choosing not to offer any tracked services at the moment.
If you want to offer different services and charges on different types of items (e.g. a different category/size/shape), you are best to create a separate template. For example, if I wanted to offer the charges shown above for most of my items, but I wanted some different charges and services for helmets, I would need to create a new template called 'Helmet Template' (or similar). I would then list my helmets under this new 'Helmet Template' instead of the default.
You will see that, for each template, you can also select if you would like to allow products with this template to be shipped internationally, and whether or not you'd like to allow Click & Collect:

At the time of writing, you can find your settings for Click & Collect and international delivery rates within eBay here:
- Go to your Account settings.
- Click 'Postage preferences' (under the Selling section).
- Here you can see your Click and Collect status - it will show 'Enrolled' if you are active.
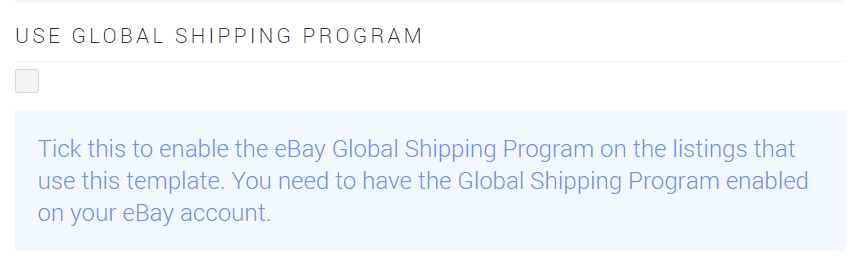
You can also see from this page if you are enrolled in eBay's Global Shipping Programme. If enrolled, you can enable that on your Cloud MT template also, like so:
NOTE: If you make changes to a template, you will see these changes reflected on eBay when the items using that template are next revised. If you want to force this to happen sooner, you can manually revise individual items*, or you can use the 'Force Revision' button in Marketplace Tools > eBay Management to revise all of your listings. Please be aware that this bulk action can take some time to process.
A note on Cloud MT Templates, eBay Postage Policies and eBay Postage Rate Tables
When you create or amend a Cloud MT eBay template, this creates a new Postage Policy in your eBay account. Each policy reflects the charges for one row of your eBay template.
You can view your Postage Policies from Account Settings > Business Policies.
eBay will automatically assign a Postage Policy to a listing, based on the template you have assigned in Cloud MT and the price of the item. You can view which listings are using a particular policy using the 'Listings' column on the right-hand side of the Business Policies page:

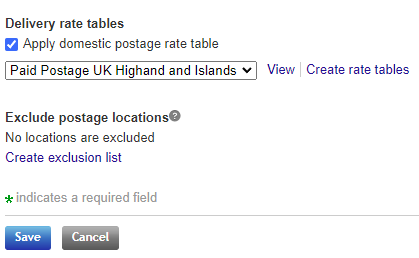
If you would like to assign different shipping charges for different locations, you can do that by assigning a Postage Rate Table to the Postage Policy. Click 'Edit' beside the Postage Policy, and scroll down to the 'Delivery rate tables' section, shown here:
To create and amend your list of Postage Rate Tables, navigate to your Account settings and choose 'Postage preferences'.
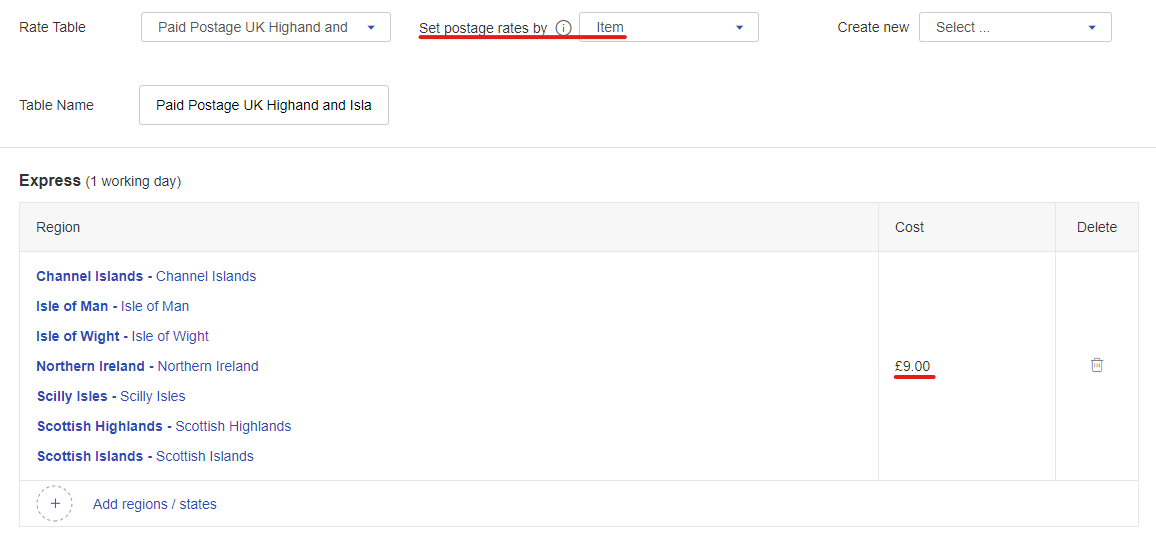
If you set a Postage Rate Table by 'Item', it will override the charges from Cloud MT / the associated Postage Policies for those locations. For example, if a Postage Policy charged £5.95 for next day shipping, this Postage Rate Table would override that to charge £9.00 for the locations shown:
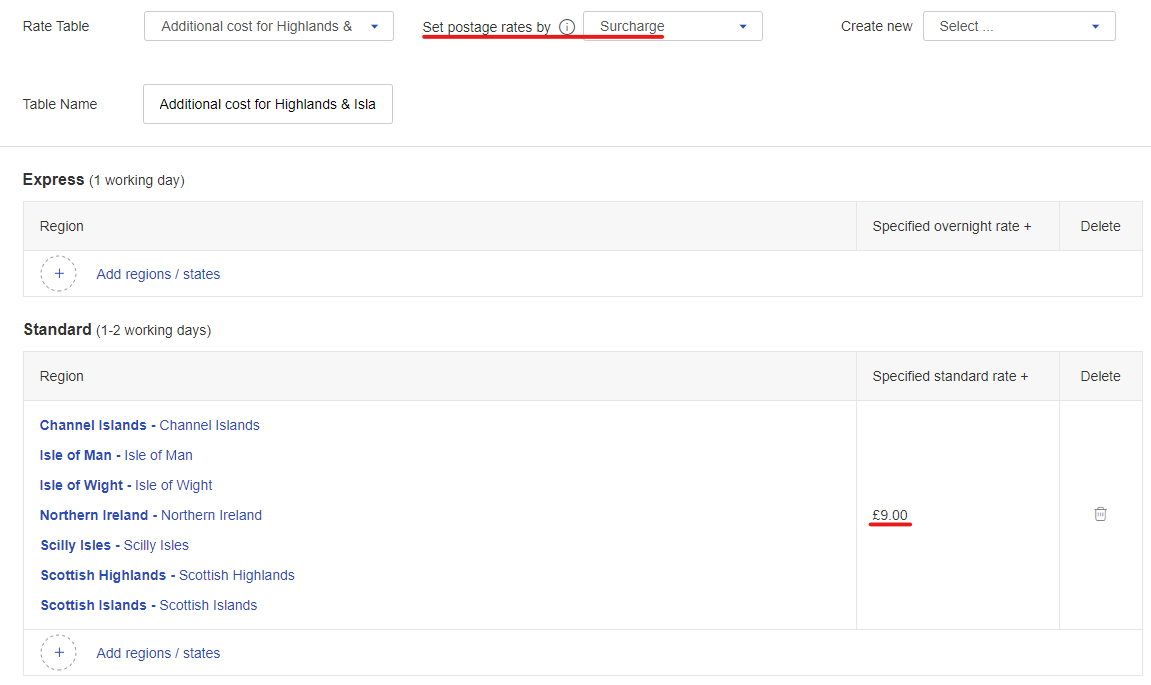
If you set a Postage Rate Table by 'Surcharge', it will add to the charges from Cloud MT / the associated Postage Policies for those locations. For example, if a Postage Policy charged £3.95 for standard shipping, this Postage Rate Table would increase that charge by £9.00 for the locations shown, making the total cost £12.95: