If you are using a CitrusPay Terminal, we may have also sent you a TP-Link Router in order to assure a stable connection between POS and your PinPad.
This is usually for customers using PlusNet or BT, but may include other networks too.
Once your TP-Link Router arrives, you may wish to give the Support Team a call to walk through the final steps for setup, or you may wish to use this step-by-step Article to finish the setup yourself.
Step 1: Plug in Hardware
Find the three antennae in the bottom of the box, and attach these to the golden screws on the back of the router.
Find the power cable and plug this into the back of the router on the far left.
Then, we need to connect the TP-Link router in the place of your current router.
This may be as simple as taking the cables from the back of your existing PlusNet/BT (or other) router, and plugging them into the new one.
The TP-Link needs a power cable, and then either an ethernet cable or a DSL connection for the input. We would recommend using the same connection as your previous router did, so which you go for here usually depends on this.
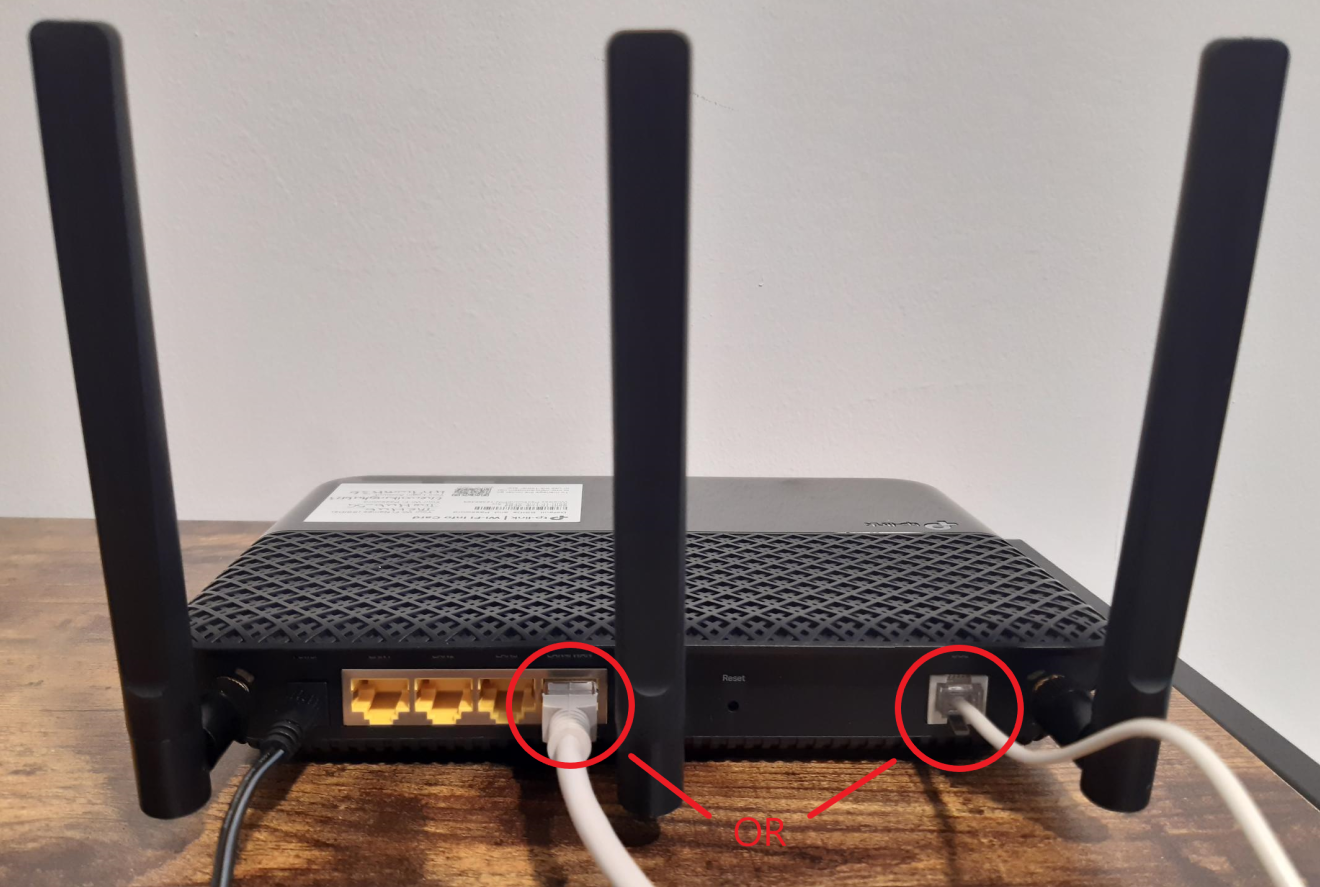
If you're using an ethernet cable, this plugs into the LAN4/WAN port, which is the 4th in from the left. If you're using a DSL connection, this plugs into the port at the far right.
Switch the router on using the power button on the side, and at this stage you should see lights start to illuminate on the top.
Step 2: Complete Quick Setup Steps
Once our router is plugged in and switched on, open a new tab in Google Chrome and visit the following address by inputting it into the web address bar and hitting 'Enter': 192.168.1.1
This should bring you to the login page for your new TP-Link.
Log in using the credentials stuck on your TP-Link sticker.
At this stage, follow the on-screen instructions of the Quick Setup Guide to link up the router with the existing network connection.
After choosing the appropriate Region and Time Zone, you will need to input the ISP Settings. These should be entered as follows:
ISP List
The name of the option selected here should relate to the network you currently use - such as 'Plusnet_VDSL'.
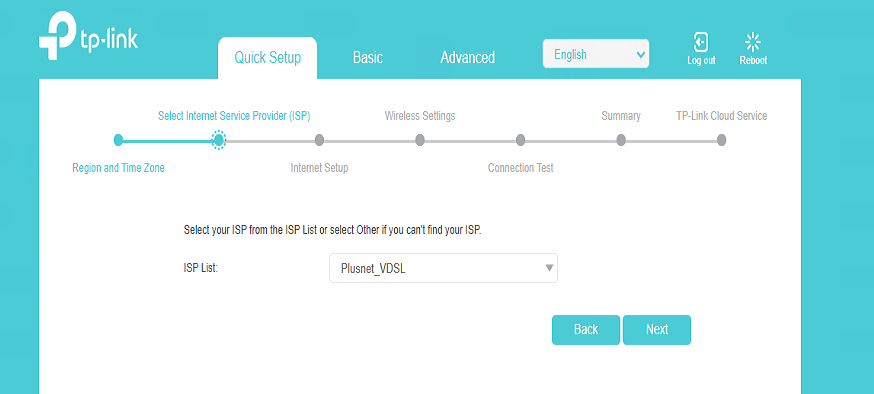
Hit 'Next', for the Internet Setup.
Here, the input will depend on your internet service provider.
PlusNet
Connection Type: PPPoE
Username: [PlusNet Account Username]@plusdsl.net
Password: [PlusNet Account Password]
BT
Connection Type: PPPoE
Username: bthomehub@btbroadband.com
Password: BT
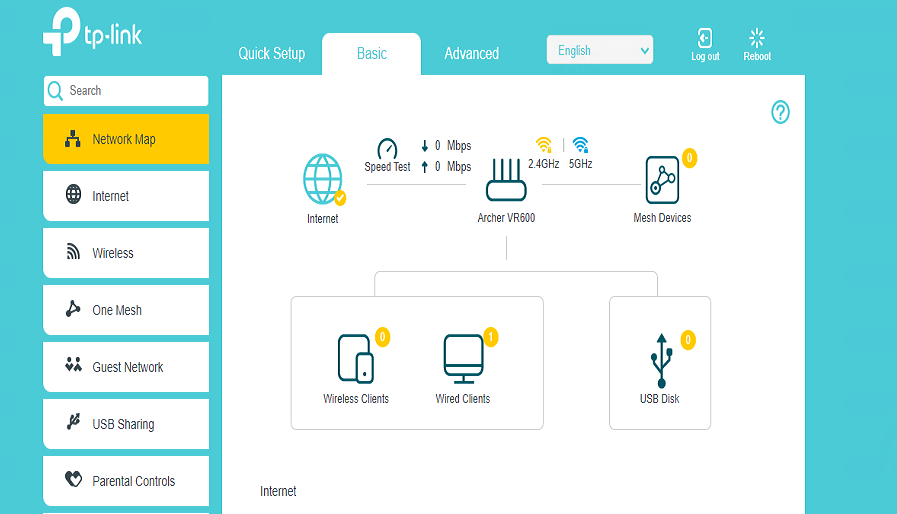
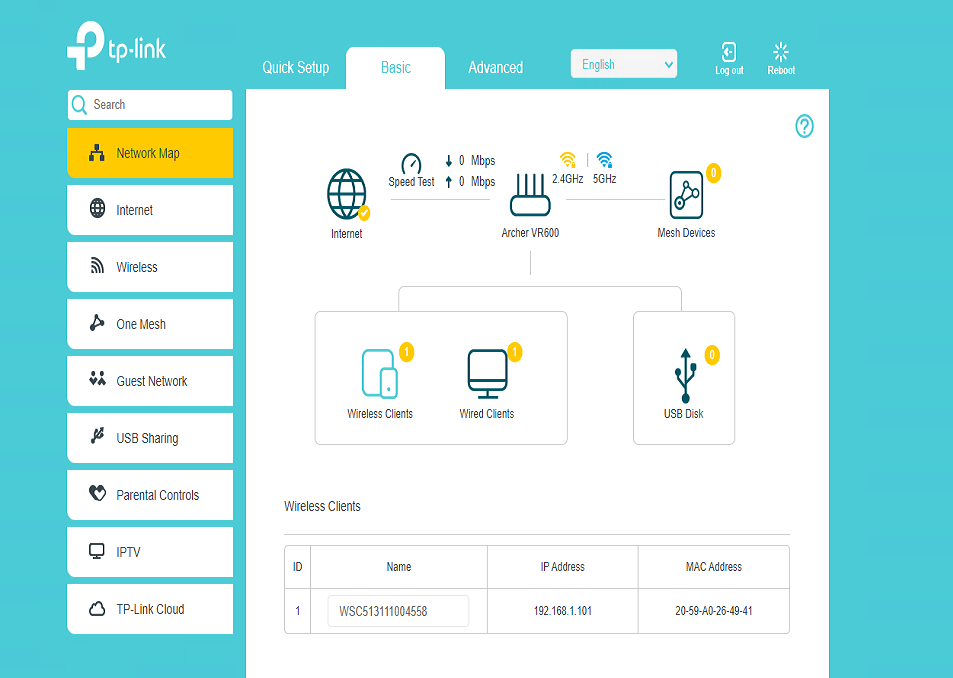
Once we have completed the Quick Setup steps, the router dashboard should show that there is an active internet connection. We can check this by clicking on the 'Network Map' in the menu on the left-hand side, and checking the left 'Internet' icon:
Before moving onto Step 3, it is worth double-checking the DNS settings are still the same ones that we at Citrus-Lime have input for you.
To do this, click on the 'Advanced' tab at the top of the dashboard, and hit 'Network' in the menu at the left. Under this menu, click 'LAN Settings'.
The DNS settings should be:
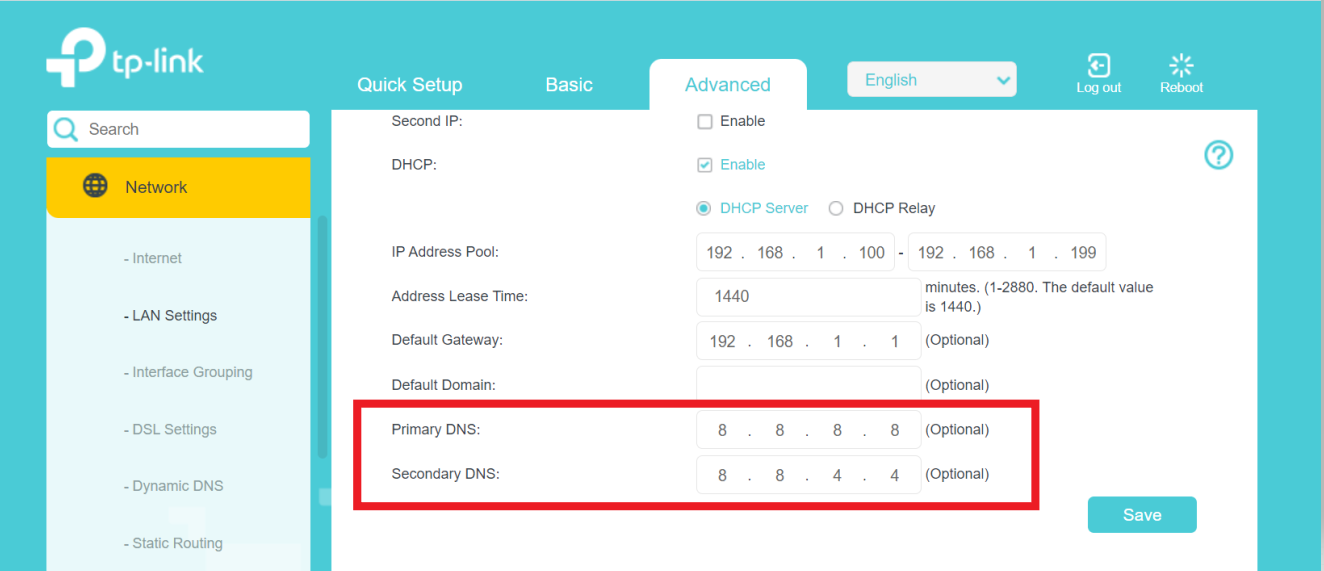
Do not make any changes here, as these are crucial to establishing the connection with your new PinPad.
Step 3: Connect and Test Devices
At this stage, we will need to get our PinPad connected and set up.
The CitrusPay terminal may automatically connect itself via the Tp-Link, but if not you will need to connect it to the new WiFi via the PinPad's settings.
To do this, swipe from the left on your terminal screen to reveal 'Settings'. The password is 07139. Then, under 'Network', you should be able to see the new WiFi network and connect to it.
Once the Pinpad is connected, the router dashboard will show the CitrusPay terminal as a connected device. Its name should be its serial number (but you can rename it if you would like).
We should now be able to successfully tender card transactions through POS with the PinPad, using the 'Credit Card' tender type.
It is also a good idea to check that your receipt and barcode label printers have successfully connected to the new router, by printing a test receipt and test barcode. If they do not connect automatically, they may need to be switched off and on again to reconnect to the new network. If you'd like a hand with this, please do get in touch with Support.