This is a best practice guide to follow if the person processing your Ecommerce orders in the Point of Sale is not the same person who picks and packs the stock in your warehouse (or store). If the members of staff picking the items for orders are also processing those orders in the Point of Sale, they can follow this guide instead.
Step 1: Load the Picklist
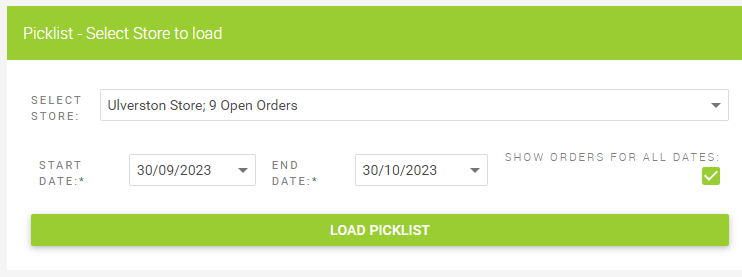
In the Cloud POS Back Office, navigate to Customers, Receipts & Orders > Picklist.
Select your store. For most users of this article, this will be your primary despatch location.
If you wish, you can set date filters to filter by dates created. Most of the time, you will want to view all current open orders by leaving the tick box 'Show Orders For All Dates' ticked.
Click Load Picklist.
Step 2: Filter the Picklist for ‘Fully in Stock' orders
To check that you are viewing all currently open orders, it is a good idea to click Remove Filters before you proceed:
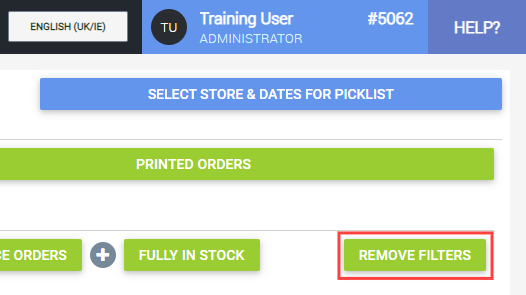
We would recommend starting with orders that are fully in stock. To do this, click the filter button for Fully in Stock, shown here:

This will filter your Picklist grid to only show orders where every item on the order is available for despatch.
You may wish to add additional filters or columns at this stage if you would like to prioritise specific order types. For example, on the far right, you have columns to filter by 'Service' (e.g. Royal Mail 24 vs. Royal Mail 48) and/or Shipping Type (i.e. Standard or Premium). You can also use the Select Columns button on the left of your screen to add/remove columns from your Picklist, depending on your preferred layout.
You will find further help with filtering and organising your Picklist here.
Step 3: Process the orders in Cloud POS
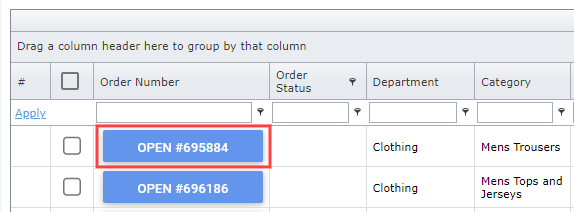
1) Recall the first order into the Point of Sale. You can do this quickly from the Picklist, by clicking the Open # buttons in the grid:
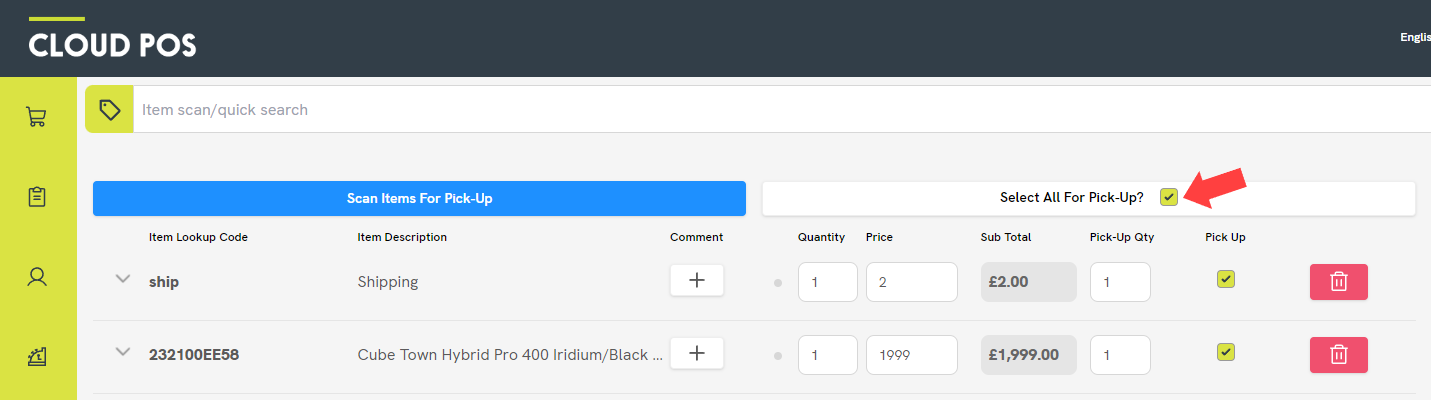
2) You will be taken to the Scan Items for Pickup window. This screen would be used if you were using a barcode scanner to despatch items that you physically had in front of you. Since this is not the case, you can skip by clicking the cross, top-right.
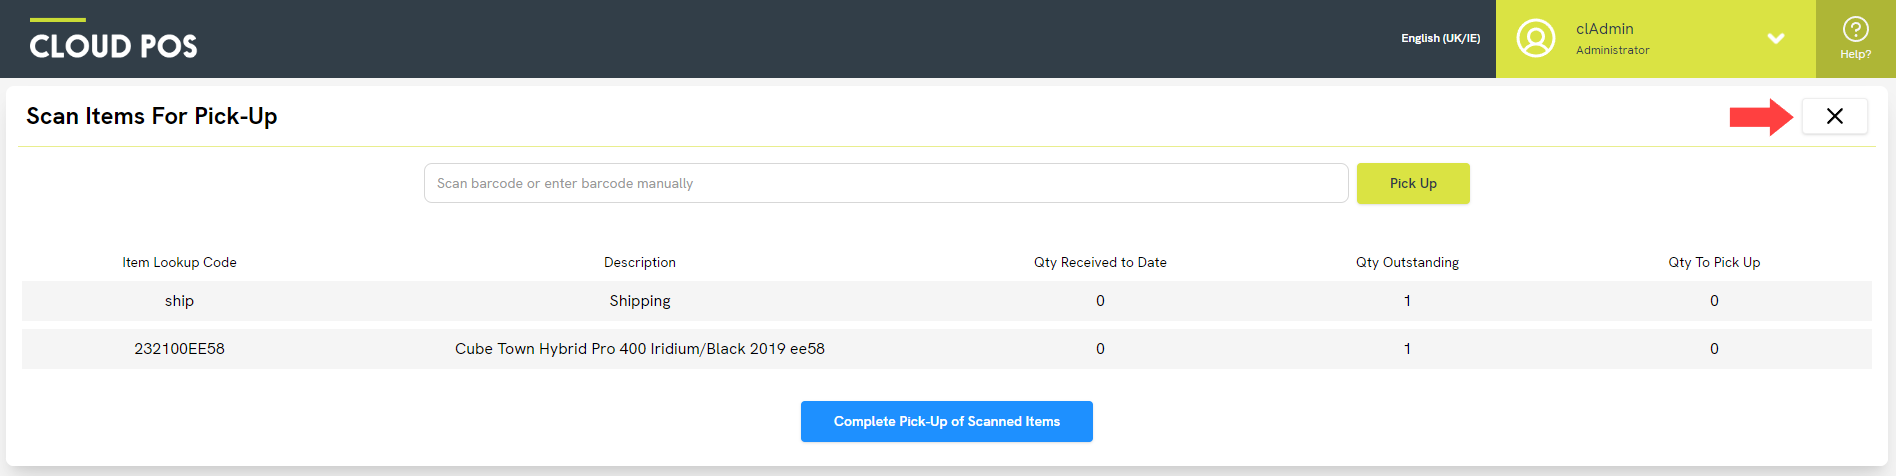
3) Use the tick box to Select All For Pick-up. This is appropriate because you're despatching an order that you already know is fully in stock. You will see each item line's Pick-Up tick box is selected.
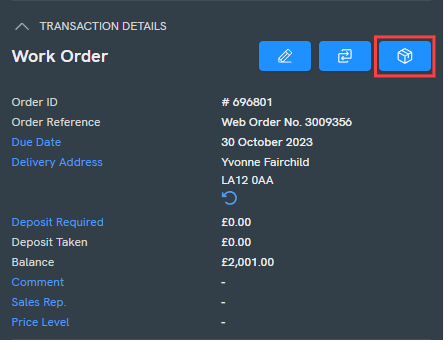
4) Click the Print a courier label button in the transaction summary panel:
5) If the customer has pre-selected their courier service online, and your Cloud POS group is integrated with that courier, you will be able to choose Buy Pre-Selected Service. If you wish to choose an alternative service option, you will see 'Pre-Selected Service: None'. In this case, click Upload, choose a service from the list and then click Buy Label.

Integrating your couriers with Cloud POS
If you'd like to find out more about integrating your coruiers with Cloud POS, so that you can easily generate and print shipping labels for your parcels within the Point of Sale, please speak to your Success Team. You can give them a call or drop an email to success@citruslime.com.
Your label will now print out of your courier label printer. If this does not happen, check that the Courier Label Application is running on your PC. This is explained in more detail here.
6) Return to the Point of Sale screen and click Tender.
7) The tender type will be automatically populated for you, so you can click Continue with Transaction on the right.
8) Select any relevant receipt options, then click Complete Transaction.
9) On the Transaction Summary screen, click the button to Preview Full Size Receipt:
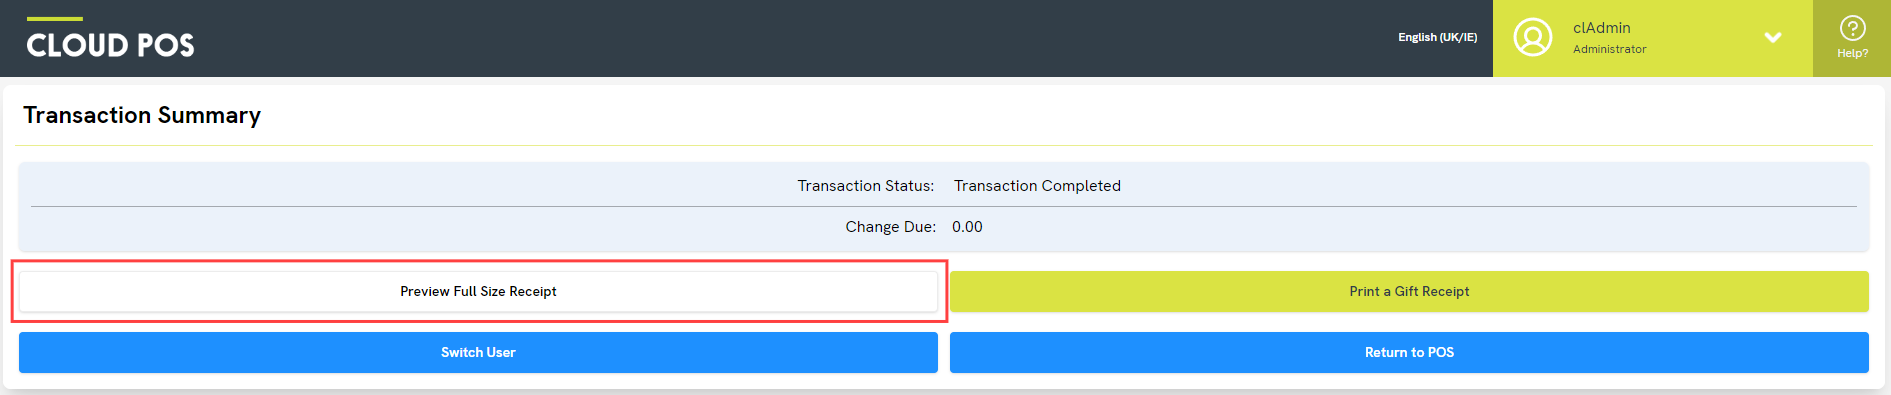
10) This will open in a new tab of your browser window. Print this document, and attach the courier label to it (e.g. with a paperclip). This can then be passed to your warehouse team to pick the items and package the order.
11) Return to your Picklist. Click the green button to Refresh Order Grid at the bottom of the screen. The order that you have just processed will disappear, as it is now closed. You can now recall the next order and repeat the steps above. Keep going like this until you have printed courier labels and Full Size Receipts for all your ‘fully in stock’ orders.
Step 4: Filter the Picklist for 'Partially in Stock' orders
Once all your ‘Fully in Stock’ orders have been processed (which will mean your Picklist grid is now empty), change your stock filter to show the 'Partially in Stock' orders:

You can now repeat steps 1-11 above, with two slight differences:
- When you print the Full Size Receipt, it will only show the items that have been chosen for despatch today.
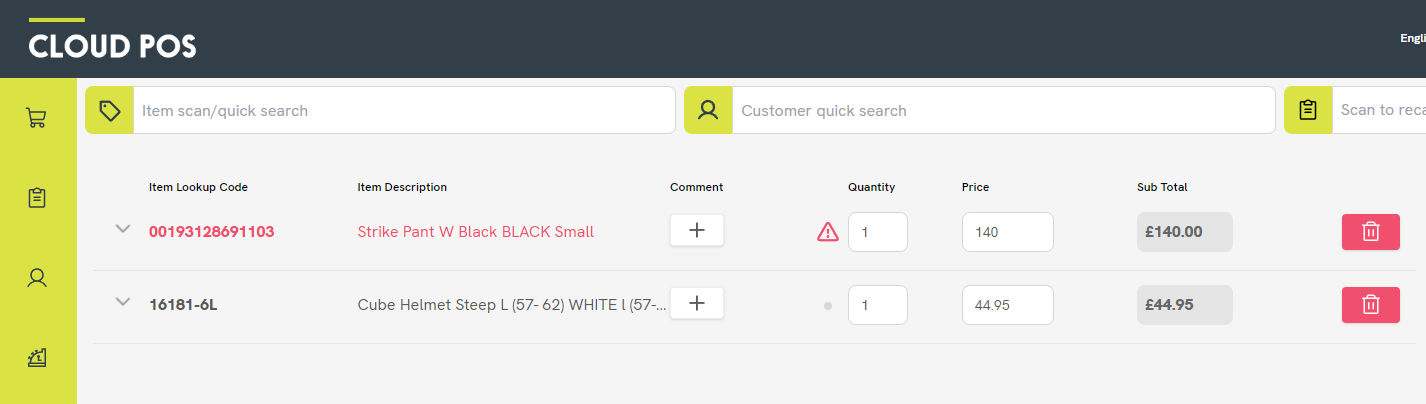
- Instead of clicking 'Select All For Pick-Up', only select the Pick-Up boxes for the items that you are able to despatch at this time. You will be able to clearly identify these items, because items that you cannot despatch will show a red warning triangle (which can be expanded to view a stock warning):
Attach the courier label to the Full Size Receipt, as before, and this will allow your warehouse team to clearly see the items that they can pick and pack today.
Again, each time you return to the Picklist, click Refresh Order Grid. Your processed orders will disappear. Once some more stock is available for those orders, e.g. the following day, they'll appear in either ‘Fully in Stock’ or ‘Partially in Stock’.
Handy Hints
You can change some settings for your register to speed up the process of despatching Ecommerce orders, particularly when using the method detailed above.
To change the register settings, navigate to Setup > Registers & Barcode Label Printers in the Cloud POS Back Office. Click Edit next to the relevant register.
If you are following the steps above, we would recommend the following settings:
- Auto Pop Full Size Receipts: checked
- Default to e-Receipts: checked
- Suppress Auto Logout: checked
- Show TaskPad Automatically: not checked
- Make Sales Reps Mandatory: not checked
- Exclude Customer Details from Receipts: irrelevant (40-Col receipts are not used in this process)