This method of creating a Purchase Order will look for any items where the current stock on hand, combined with any demand for customer orders, means that the available stock is at or below the minimum reorder level.
For example, this item would be placed on a Purchase Order:

The min-max range here is 2 - 4, but the Available stock is 1, so 3 would be placed on the Purchase Order.
This item would also be placed on a Purchase Order:

The min-max range here is 2 - 4 again. The Available stock is 2, which is within that range. However, because it is currently at the minumum level, Cloud POS will still suggest ordering 2 more, as the next sale of this item would result in you dropping below your preferred stock levels.
This item would not be placed on a Purchase Order:

This item is 'safely' within its min-max range, with 3 as the Available quantity.
Remember that the Available quantity takes any stock commitments into account. Therefore, if the item in the screenshot above was on a Work Order, it would then appear on a Purchase Order, because the Available quantity would drop down to 2.
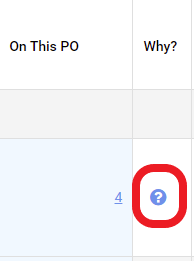
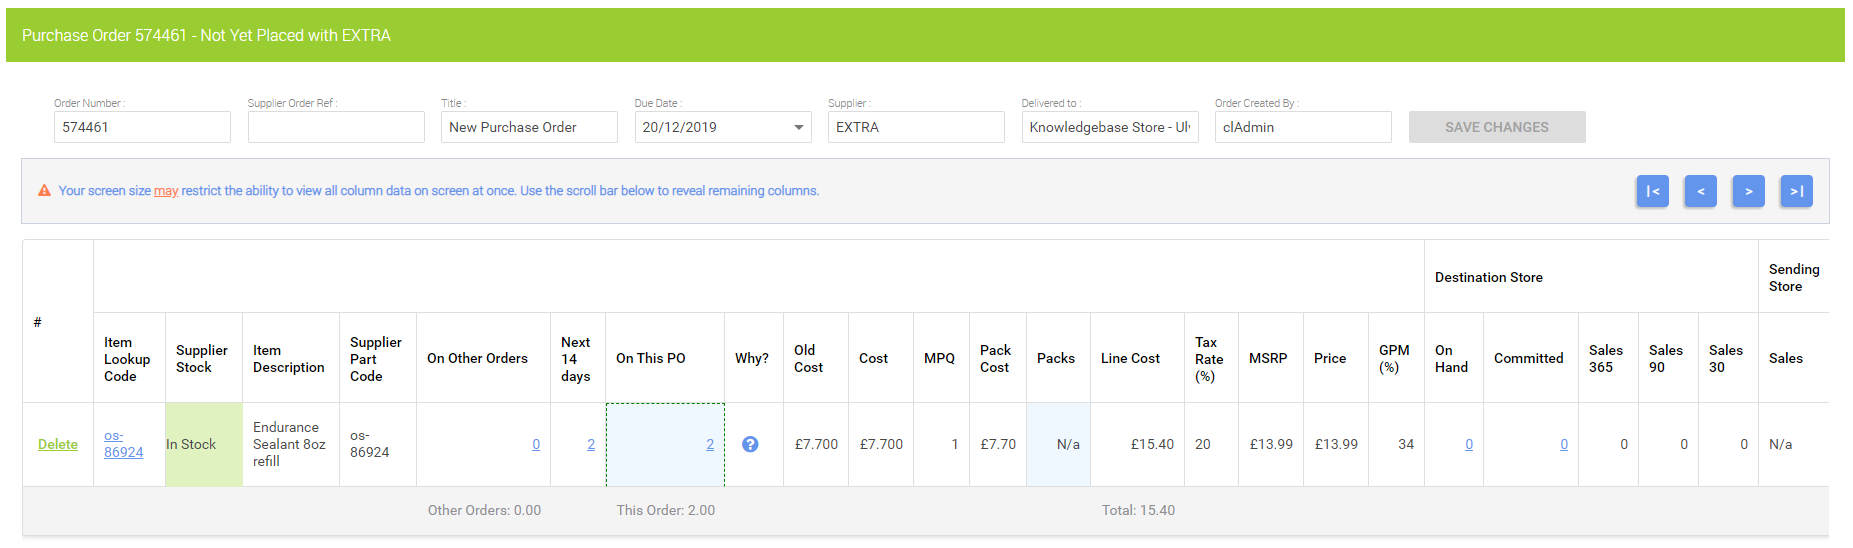
Once your Purchase Order has been created, you will be able to click into the 'Why' column to see an explanation of these calculations:
Follow these steps to create a Purchase Order based on reorder levels.
1) Within the Cloud POS backoffice menu, select Purchasing & Transfers, then Purchase Orders;
2) From the purchase order grid, select New;
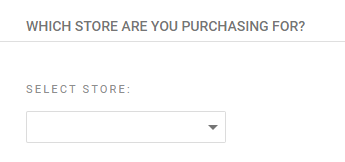
3) Select your store from the drop-down list:
4) Select the suppliers you would like to order from – you can select from one to all:

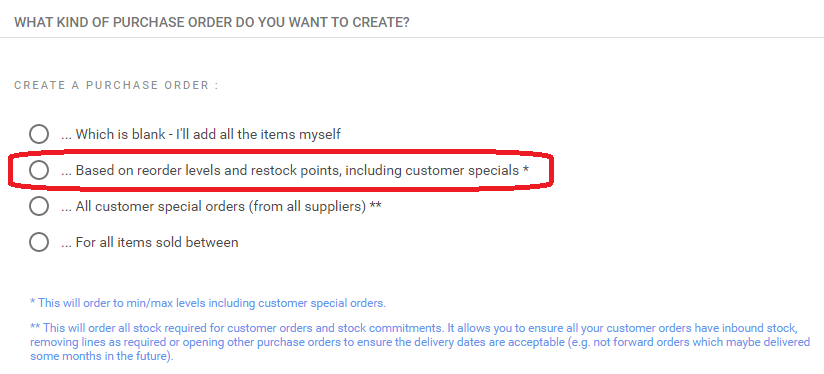
5) Choose the option Based on reorder levels and restock points, including customer specials:
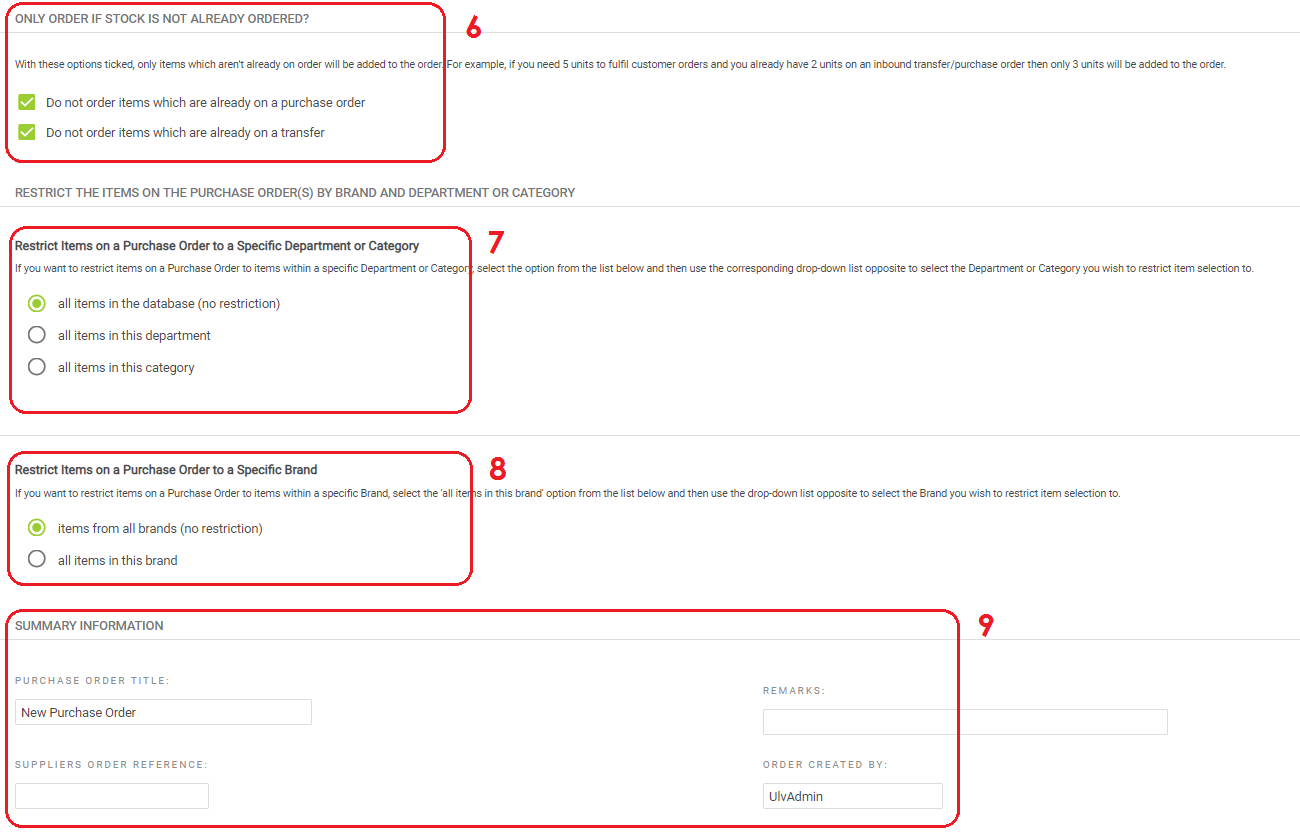
6. You can restrict an order to exclude items which are already on a purchase order or transfer.
7. You can restrict an order to only look at a certain department or category or select ‘all items in the database (no restriction)'
8. You can restrict an order to only look at a certain Brand, or select 'items from all brands (no restriction)'
9. Purchase orders can be given; a title (this is mandatory), a supplier order reference, remarks (comments) and who the order was created by. These are optional, but can add helpful detail.
10. Once you have made your selections, click CREATE PURCHASE ORDER(S):
Viewing and editing a purchase order
1) Once created, you can view the new purchase order(s) within the purchase order screen from the main menu, or using the quick link straight after creation:

2) Within the items list screen you can; view the items on the order, check supplier stock, add or remove items and see why items were added to the purchase order:
3) If you need to make any changes, make these now. When you are ready to place the purchase order, click Save Changes and then Mark as Placed.

4) When the purchase order has been Marked As Placed, you will be taken back to the list of purchase orders. If you wish, at this point you can edit the purchase order again and use a quick link to take you directly to the Goods In area where you can book in stock.
5) From the purchase order list, use the filter options to locate your purchase order, then click Edit Items:
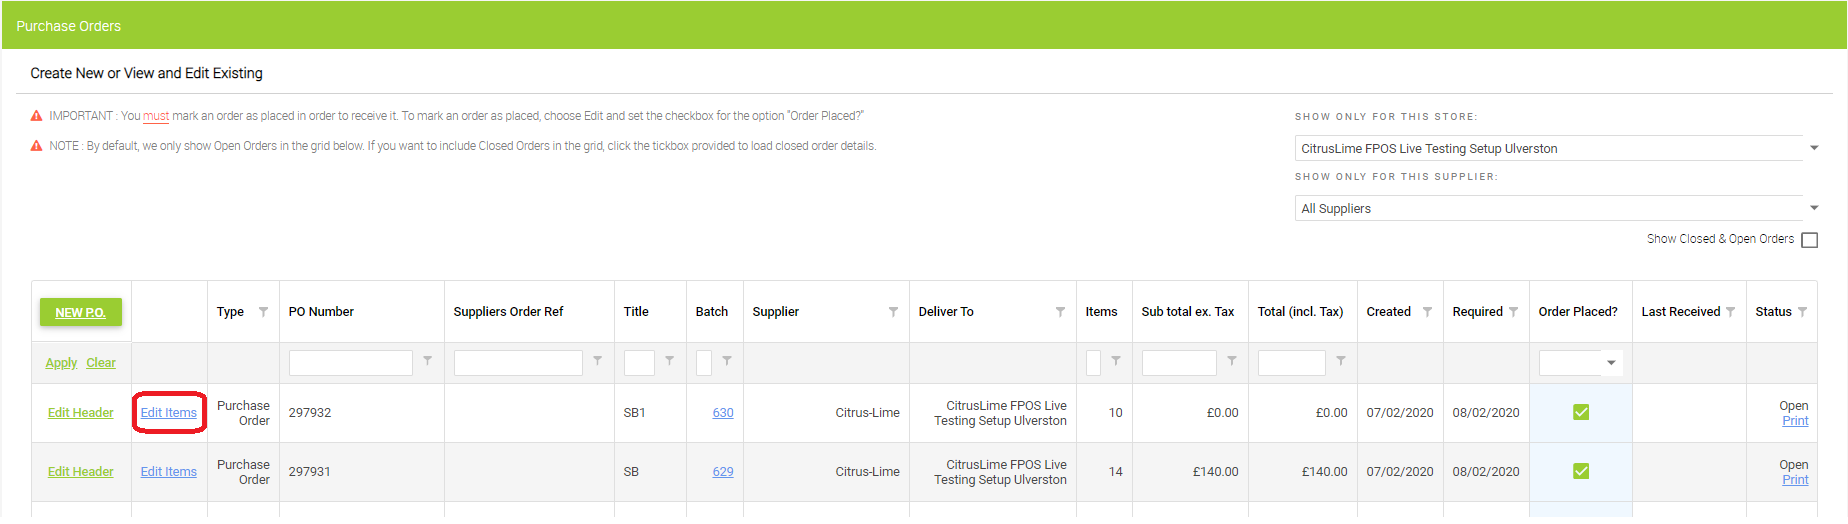
6) This will open up the purchase order. You will see the Mark As Placed button has now been replaced by a button marked Receive Stock. Clicking this button will open the purchase order at the Goods In stage, where you can then receive the items into stock.
