WordPress Overview
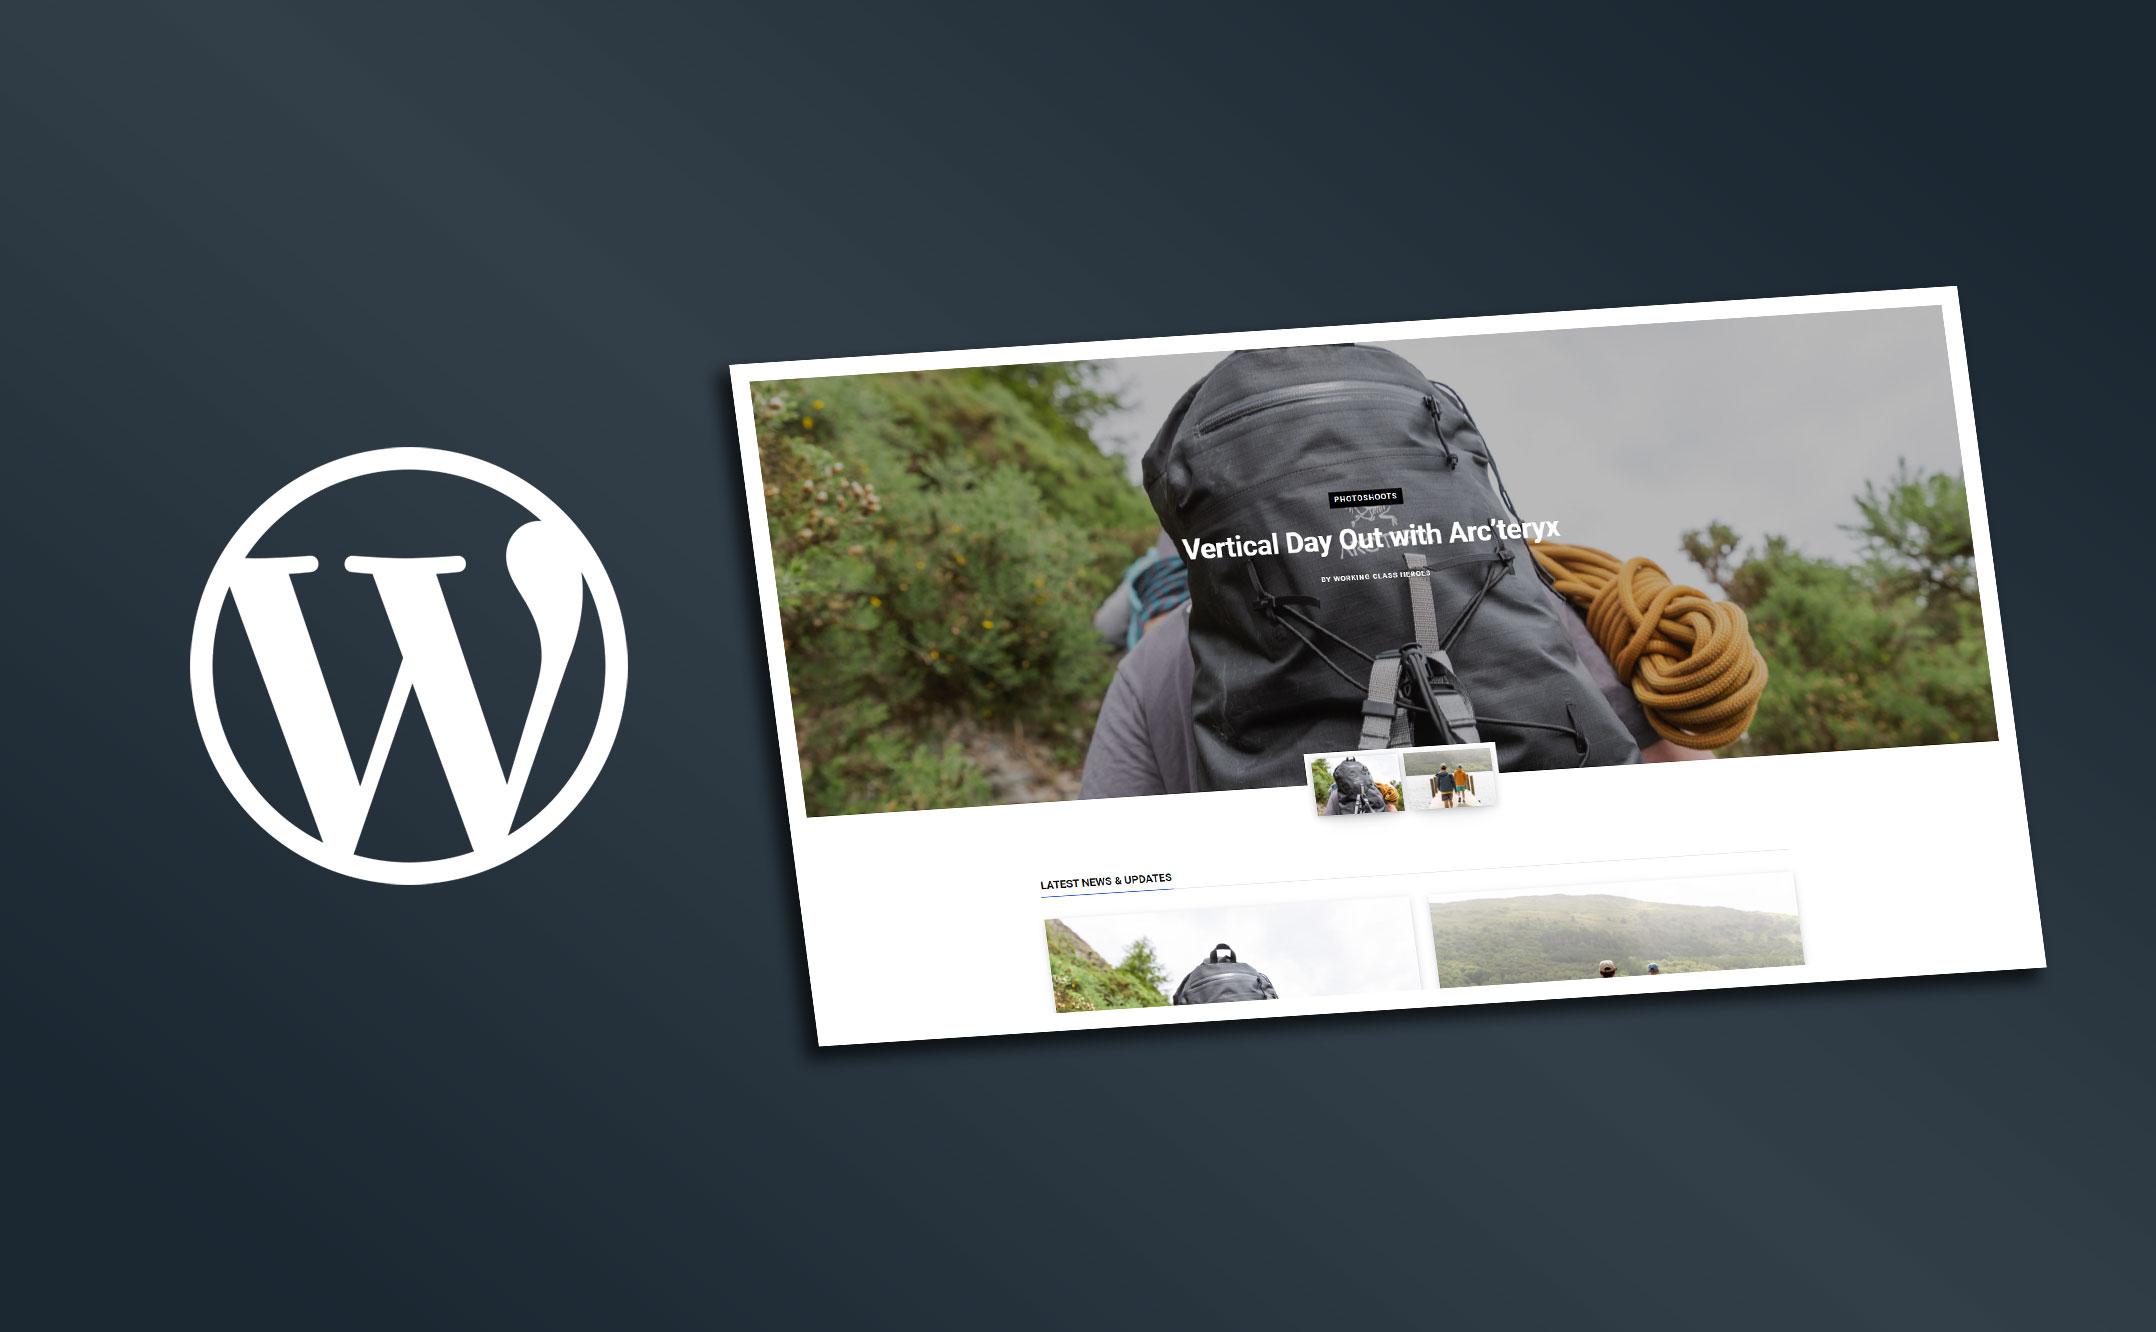
WordPress is an incredibly powerful CMS (Content Management System) that has been used to create over 40% of all websites. The Citrus-Lime WordPress integration utilises this functionality to allow you to create and host content directly on your ecommerce website, typically under the www.my-website.com/blog/ subdomain.
This article will cover the core elements of the Citrus-Lime WordPress integration, most focused around managing and publishing content.
Managing Content
To begin creating content, head to the WordPress dashboard. This can be accessed through the following URL, changing blogname to be the unique name* given to your blog: www.blog.citrus-lime.com/blogname/wp-admin/
The dashboard gives you an overview of recent activity and can be used to access all parts of the WordPress integration.
* If you haven't received a blogname or link to the WordPress, please contact your Support Team who will be able to provide you with this.
Creating and Managing Posts
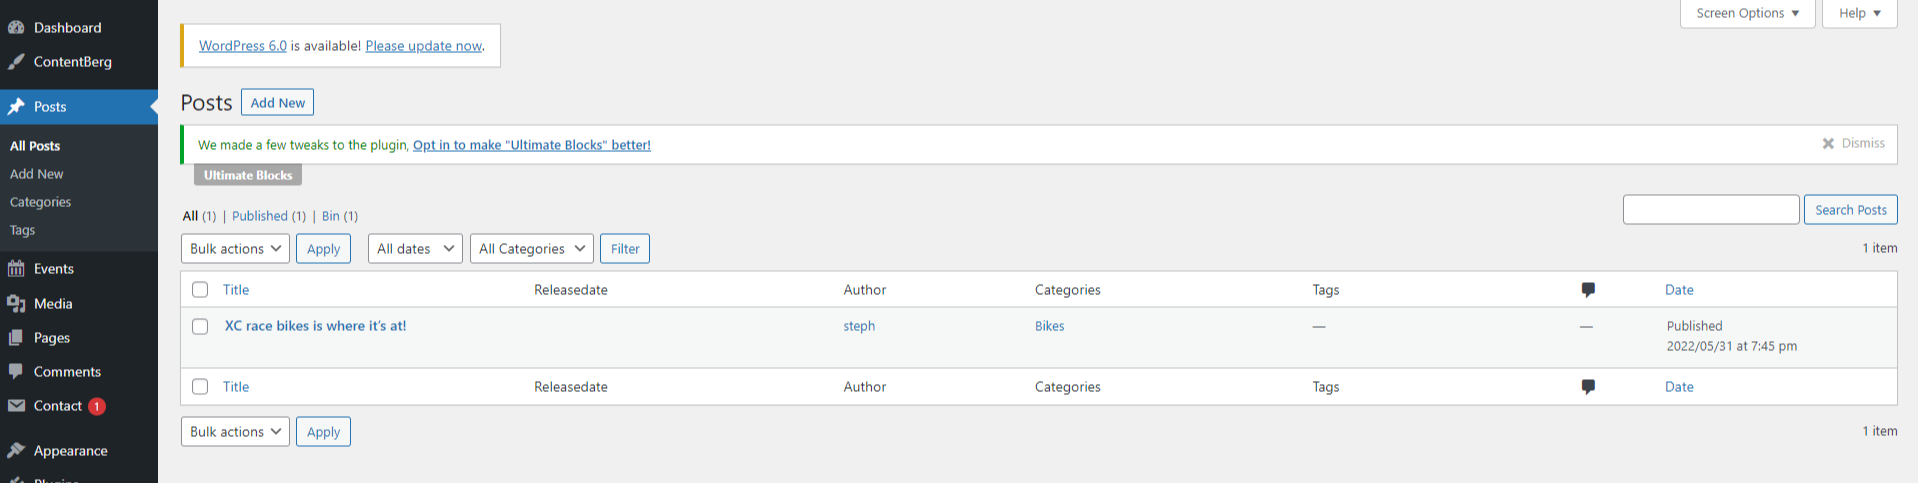
Using the navigation on the left-hand side, click on the 'Posts' menu option. You will then be presented with the Posts overview. Here is where you will come to create and manage all of your WordPress posts. To get started on a new post, simply click on the 'Add New' button at the op of the page.
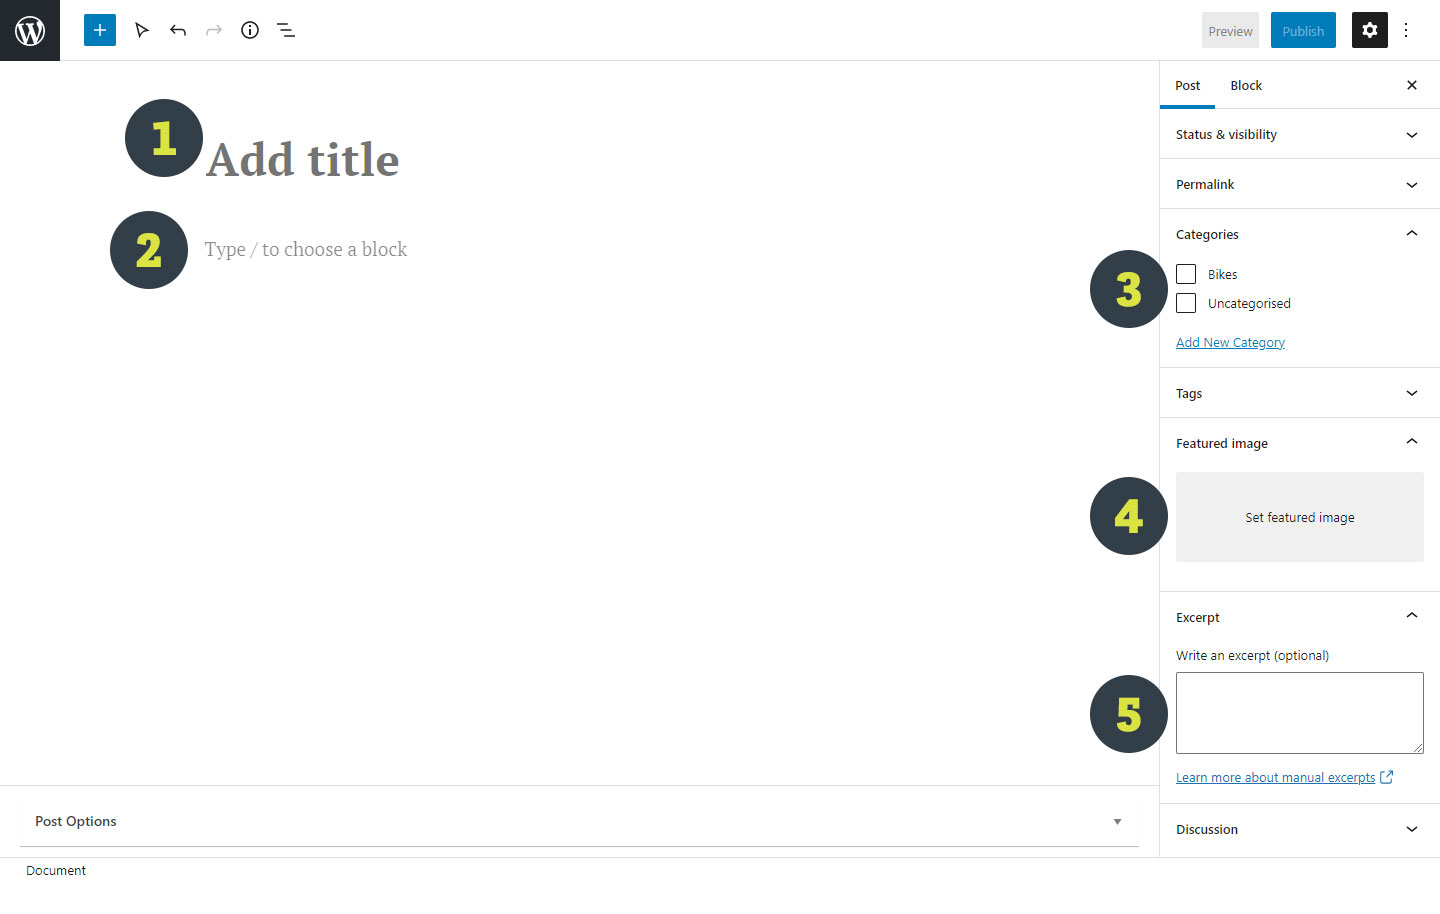
You will now see the WYSIWYG editor (What You See Is What You Get). This simple, intuitive editor will allow you to create posts efficiently without the need of any coding knowledge - it is entirely possible to paste content in, including imagery, directly from a Word Editor without the need to do any further edits.
There are a plethora of tools at your disposable, too many to go through in one guide. Of those, listed below are the key areas that must be set when creating your posts.
-
Title
The content set here is used to generate the post title and URL. For that reason, we advise that you agree on a title before publishing. Changing the title after will cause the URL to change, undoing any valuable SEO content your post would have achieved.
-
Content
Here is where all your content will go. You can type directly in to the editor, paste from a Word Editor or use on the many pre-defined blocks from within WordPress.
-
Categories
Categories provide a helpful way to group related posts together. Think Product Reviews, Guides, Latest News etc. Simply select an existing category or create a new one using the 'Add New Category' link.
-
Featured Image
The image set here will be used as the post's main image on the blog homepage and as the hero image on the post itself. If an image is not set a blank space will show instead.
-
Excerpt (optional)
This acts as the snippet text to your post and will feature on the blog homepage. Whilst optional, we recommend that an excerpt is set to provide more meaningful content to your blog homepage.
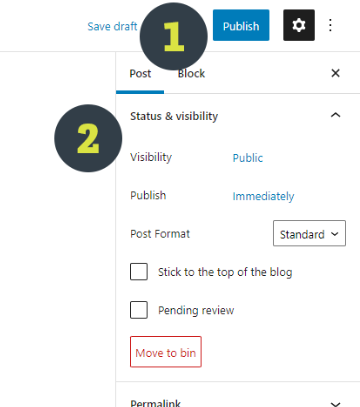
Once the above have been set and you are happy with your content, you can go ahead and publish your post using the publish button (1). This will provide you with a short review, in case you have missed anything from the post.
Alternatively you're able to modify (2) the visibility and date before doing so. This would allow you to schedule posts to appear in your blog at a future date, make them appear as if they were created in the past or only make them visible to admins of your blog account.
Once all has been set, confirm you're happy and hit the Publish button to make your post live!
This will push your post to your live blog in the following format:
www.my-website.com/blog/post-title/
Further guides on how to create posts can be found using the links below.
- https://wordpress.com/support/wordpress-editor/
- https://wordpress.com/support/wordpress-editor/learn-the-interface/
- https://wordpress.com/support/wordpress-editor/add-content-blocks/
- https://wordpress.com/support/wordpress-editor/customize-blocks/
Existing Content
You can quickly edit, delete and update existing post content from the main Posts page. Simply find the name of the post you're looking for, hover over it and you are presented with a few options to:
-
Edit
Takes you back to the main post editor
-
Quick Edit
Quickly update the title, author, categories and a few other aspects of a post
-
Bin
Effectively 'deletes' a post from your blog. This can be undone if needed, though they will only remain for 30 days before being permanently deleted.
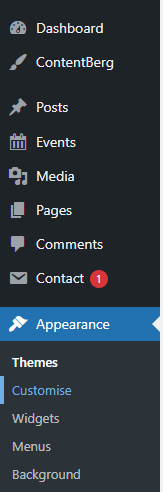
Updating Blog Appearance
Your blog will come with a predesigned theme to match your website branding, though you have control over certain elements of the theme that you can update as and when needed. To customise the appearance, head to the left-hand side menu and go to 'Appearance, Customise':
You will then be presented with the Theme Editor. In here, you'll see the blog homepage along with a menu of all aspects of the blog theme you will be able to update.
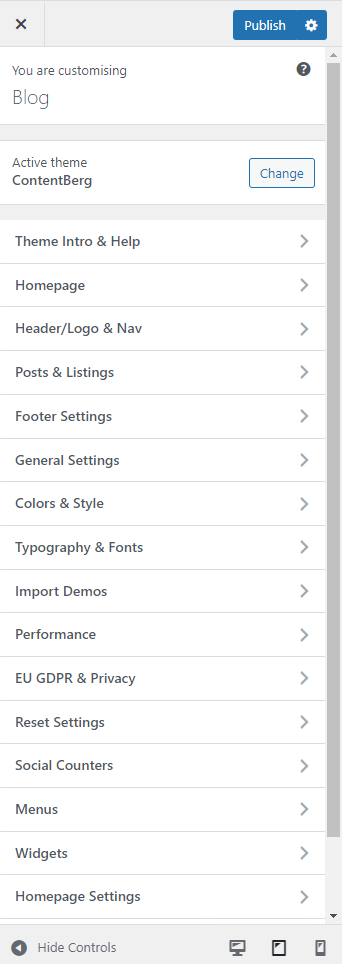
Here you can change colours, layouts, fonts, add/remove items from navigation options and a whole heap more.
Please note, depending on the theme and your user access level, not all options may be available to you.
A detailed description of customised the appearance can be found in this WordPress documentation:
https://wordpress.org/support/article/appearance-customize-screen/
Once you're happy with all your changes, simply hit the 'Publish' button along the top. You can also save your changes as a draft or choose to publish them at a later date.
Installing Themes, Plugins and Additional Content
Whilst WordPress can be heavily customised, for security reasons you will not have the ability to install custom content on to your blog without the assistance of a member of the Citrus-Lime Team.
Please see this article for a list of WordPress plugins that Citrus-Lime are able to support: Which WordPress plugins are supported on my blog?
If you would like to add any additional themes, plugins or content then please raise a ticket to your Support Team with the following information:
- Name of the Theme/Plugin/Content
- Links or files to the content (if applicable)
Further Reading
WordPress' knowledge base contains articles covering every aspect of the above and more. You can read more in to each section by using the links below.