The Supplier Integration Module, or SIM, is a feature that provides the ability to import supplier item data directly into your Cloud POS database.
Citrus-Lime work with a range of suppliers across the cycle, outdoor, and equestrian industries. Product data we receive from these suppliers is read into the SIM database, and from there you can import that data directly into your Cloud POS database, for any suppliers you have chosen to integrate with.
There are several ways you can use the SIM functionality to add items to your database, but this article looks at the SIM Import Items feature in the Cloud POS Back Office.
From the main menu in the Cloud POS Back Office, navigate to Create & Manage Items then SIM Import Items:

You'll now see the main import screen, as below:
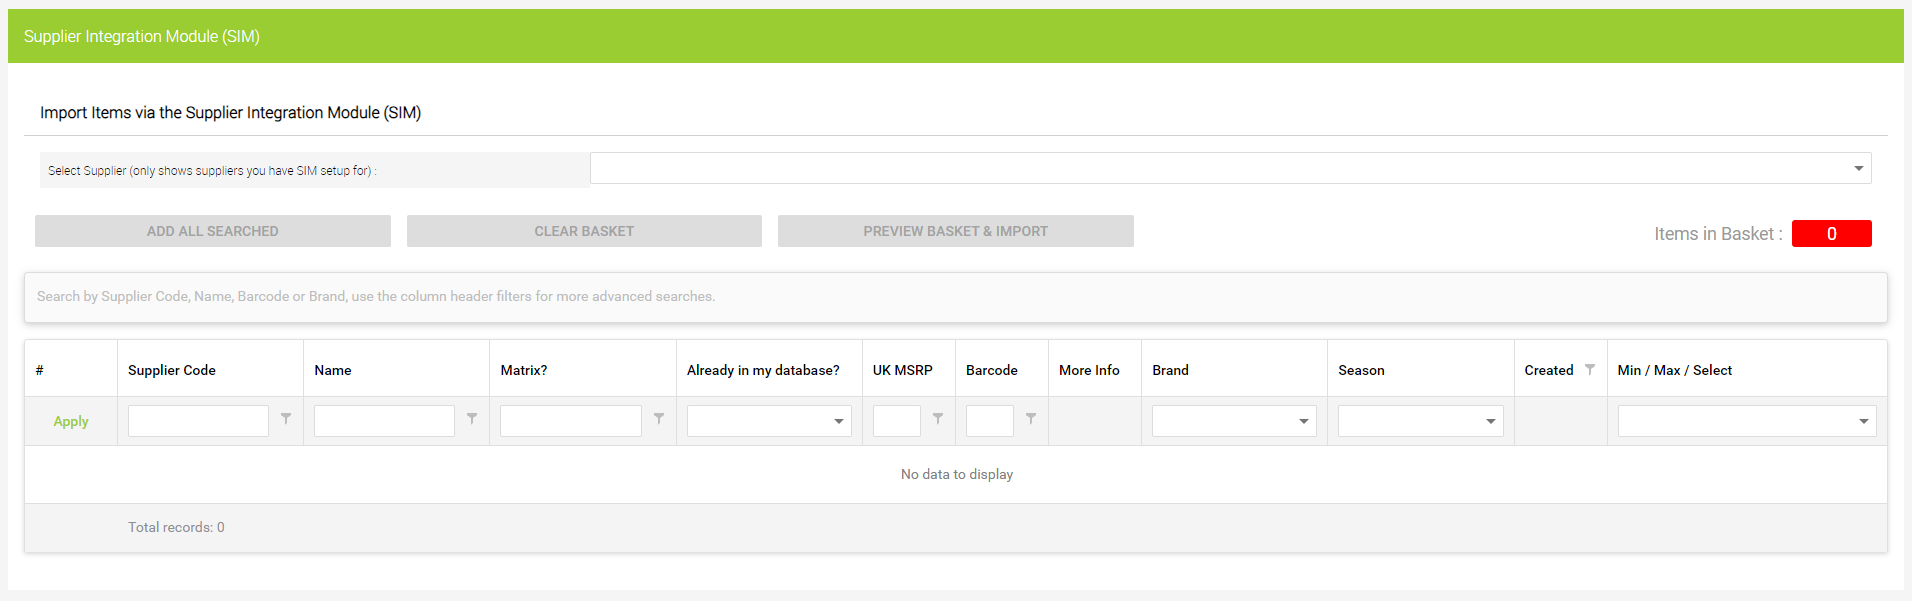
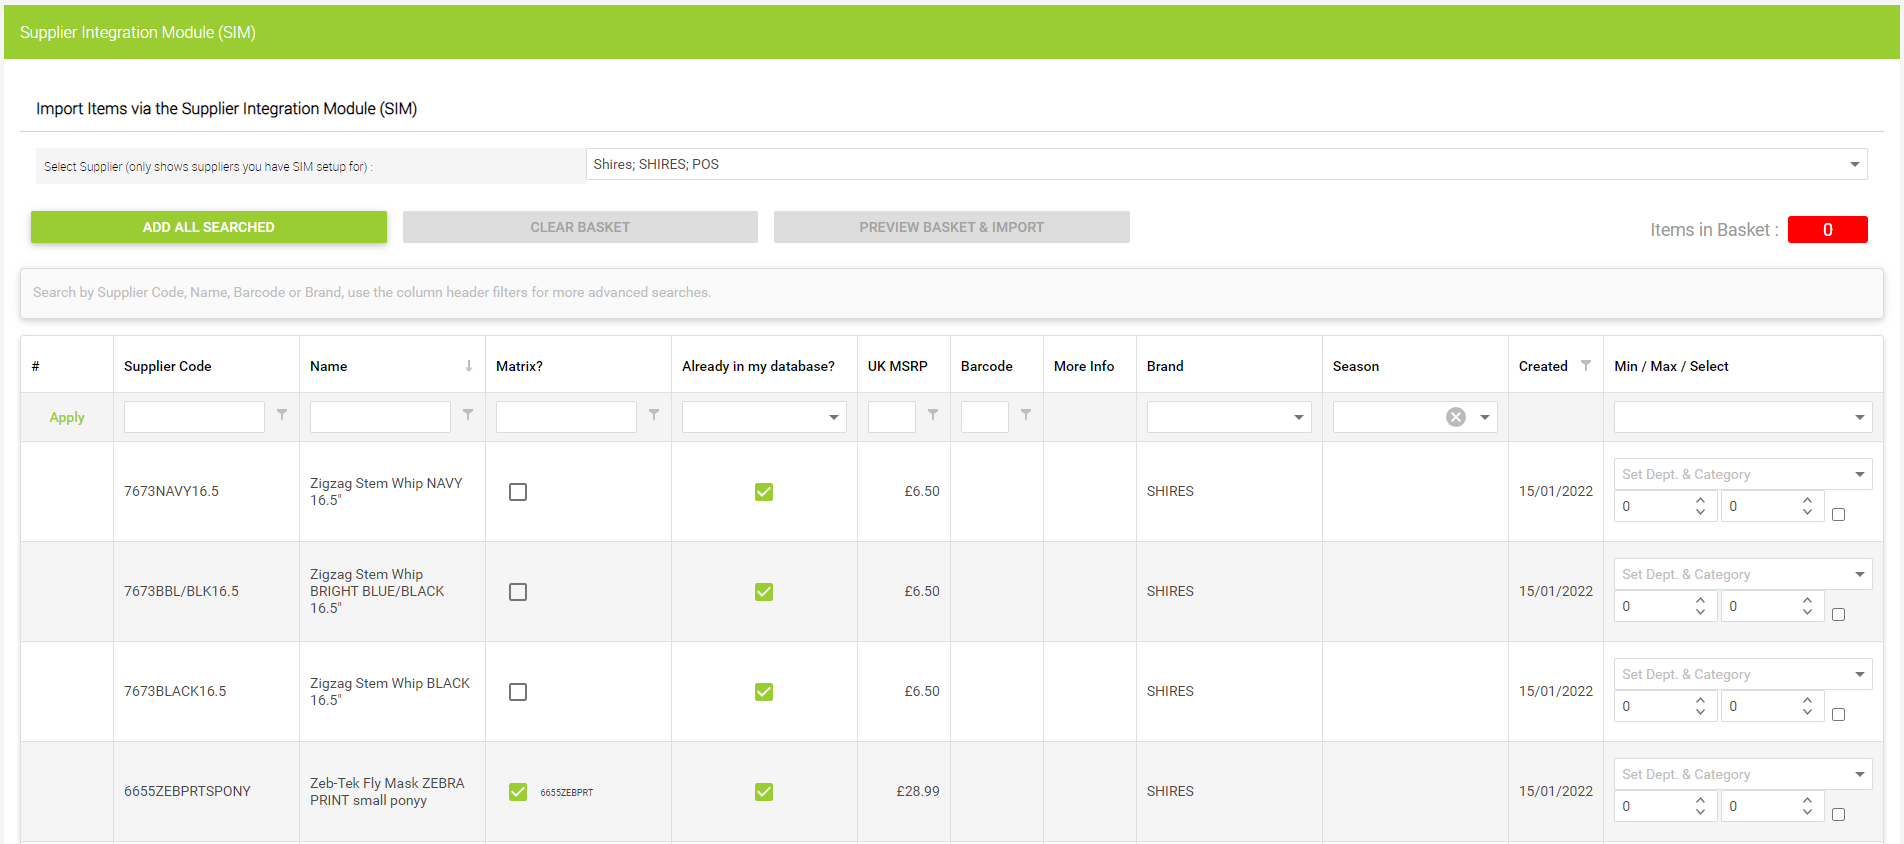
The first step is to use the dropdown menu to select the supplier whose data you wish to import. Only suppliers for whom you have a SIM licence will appear in this list:

Once you have selected a supplier, you'll see the product data that is available for that supplier will populate the grid:
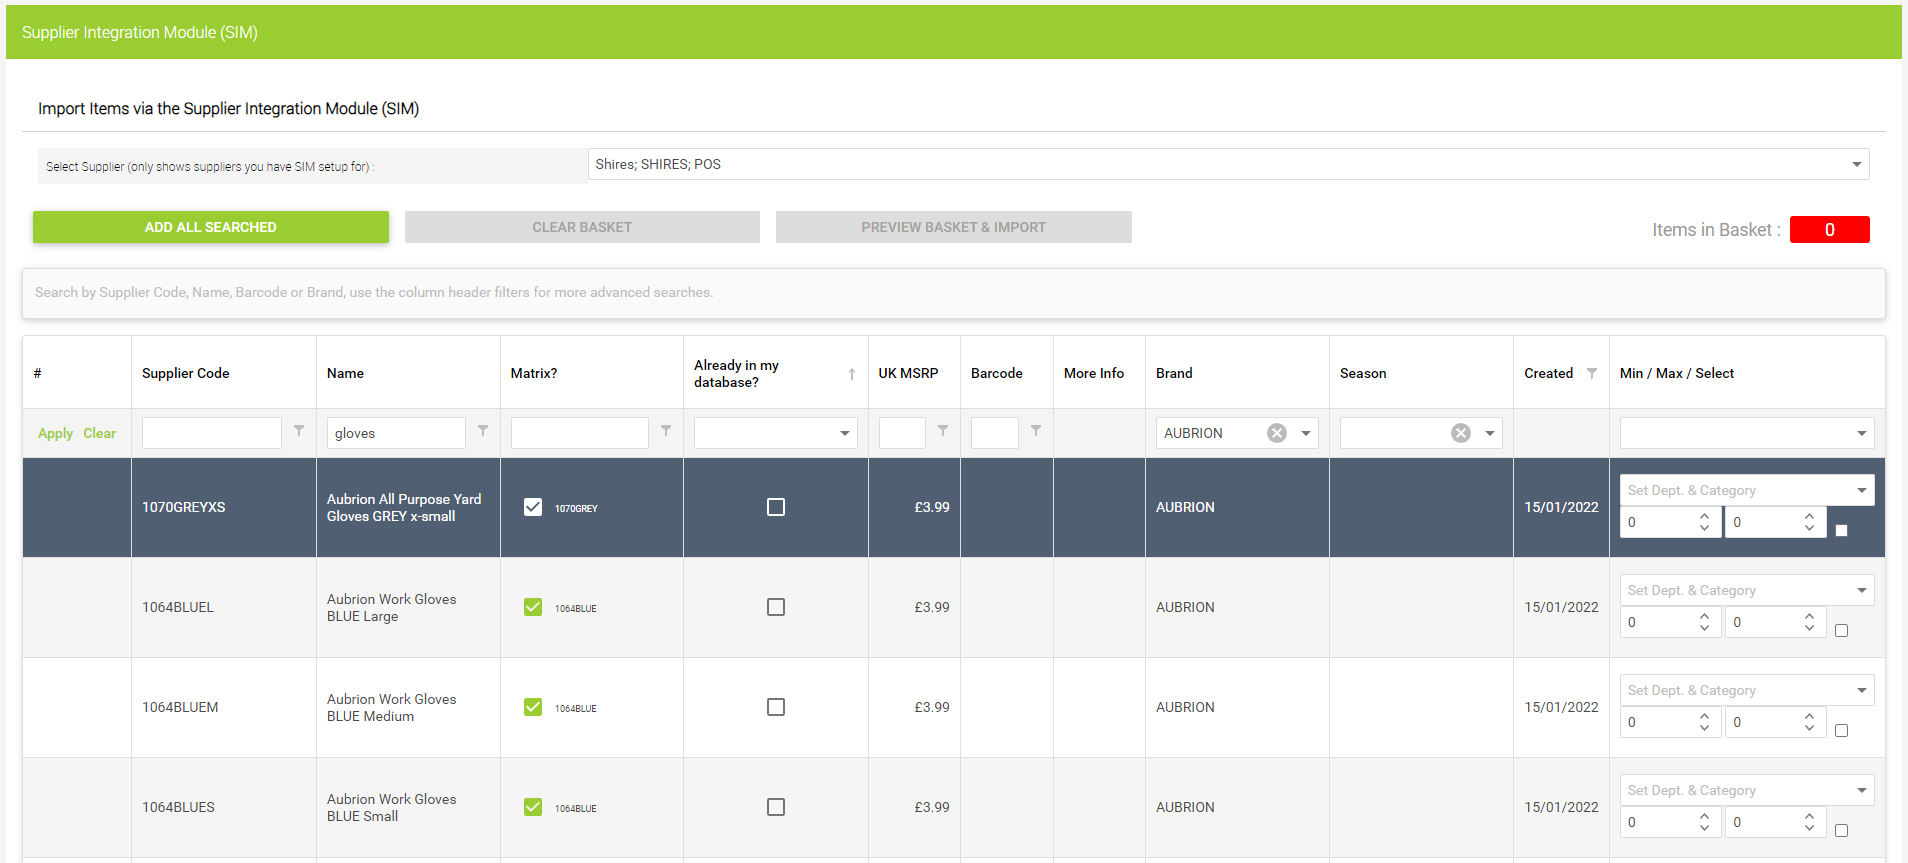
You can now use the various filter options on the column headers to find the items you would like to import. There is also a general search bar above the grid, which will search across Supplier Code, Name, Barcode and Brand. In the example below, we are searching for Names containing 'gloves' and the Brand 'Aubrion':
When you've filtered down to the items you wish to import, you now have two options in terms of how you add these to your SIM 'basket' (which you will import later).
1) If you've filtered down to a specific set of items so that all products in the grid are, for example, men's jerseys, then you can click the green Add All Searched button. This will allow you to add all items currently in the grid to the same Department and Category. You'll see the following popup window:

Use the dropdown menu to select the appropriate Department and Category, then click the Add All Searched button. This will add your items to the SIM basket.
2) If there is a varied range of items in your search results grid, then you may need to set the Departments and Categories individually. You can do this via the dropdown menu in the right-hand column of the grid:

SIM will take some of the work out of this process for you — if you set a Department and Category against an item that is part of a matrix, then all other items within that matrix will be automatically set with the same Department and Category. It will also remember the last Department and Category you set and offer this as the first suggestion when you click to set the Department and Category for the next item in your grid.
Regardless of which option you select to apply a Department and Category to your items, you'll see the number of items in your SIM basket increase as you assign them. This figure is displayed towards the top of the page:

When you have finished adding items to your basket, click the button marked Preview Basket & Import. Use this opportunity to have a review of the items you are going to import. Assigning an item to an incorrect Department or Category can be corrected once the item has been imported but spending a few moments checking now may save time in the future.
If you spot a mistake, you can make a correction in the preview basket screen. Similarly, if you see an item in the SIM basket which you didn't intend to import, then you can remove the item from the basket but unticking the checkbox under the department and category dropdown:

Once you're happy with the data you have in the SIM basket, click the button marked Import. The screen will refresh and you'll see a heading appear at the top of the page:

Clicking on the 'here' link in the heading will take you to the SIM Import Progress page, which will show you the status of your import. This page automatically refreshes every 20 seconds, so if you are only importing a small number of items, you may find that no items are shown as being queued, as they have already imported. Larger baskets may take several minutes to import.
When the SIM Import has completed, the items you imported will now exist as items ready for use within your Cloud POS database.
Items which are available from more than one supplier
In some cases, an item may be available from more than one supplier. To avoid creating multiple items in your database for the same physical item, SIM will validate the data as you import items.
To give an example of how this works, let's imagine Supplier A refers to a product as XYZ, and Supplier B calls that exact same product UVW.
Let's say you already have Item XYZ in your database, with the supplier set as Supplier A. You then try to import UVW from Supplier B.
The SIM import process checks the Alias (barcode) of the product being imported, and if it finds an existing item with the same alias, it will add the second supplier and their part code to the existing item, rather than creating a new item record.
Using our example above, this would mean that Supplier B would be added as another supplier to item XYZ, and item UVW would not be created.
The SIM Imported Items page will display any instances where this has happened:

You can will be able to add this item to a Purchase Order for either supplier.
Watch A Video: