In a multi-store Cloud POS group with an ecommerce site, you can dictate whether an individual store is displayed on your ecommerce site as a location available for Click and Collect.
This is useful functionality, as it allows you to prevent Click and Collect orders from being placed for collection at locations where you may not wish for customers to arrive. Some examples might be:
- Your main dispatching warehouse, which may not be a customer-facing environment;
- If you close a store for a period of time for a refit and are not able to serve customers whilst this is underway;
- If the store has been created in your Cloud POS group but is not open to the public as yet;
To make a store a Click and Collect location (or to hide it as a Click and Collect location), from the main menu in Cloud POS backoffice, navigate to Setup and then Stores;
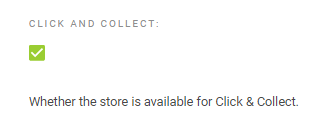
Click Edit next to the relevant store and scroll to the Ecommerce Configuration section. There you will see a check box which, when selected, makes that store a Click and Collect location visible on your ecommerce site:
When changing either of the above settings, ensure that you scroll to the foot of the page and click the Save button.
NOTE: It can take up to 24 hours for any changes to become visible on the ecommerce site.
Setting the correct Google Maps coordinates for your Click & Collect locations
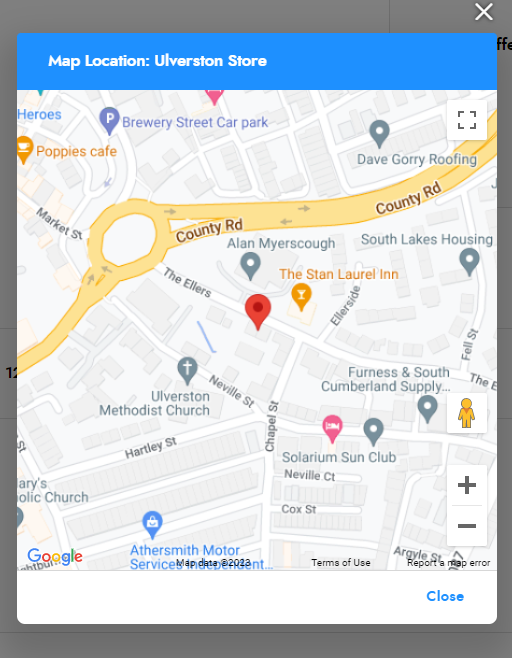
On your ecommerce site, the marker or ‘pin’ in Google Maps which denotes the location of a particular store, is based on the Postcode or ZIP entered against that store's address in Cloud POS.
These longitude and latitude settings, whilst fairly accurate, do not always result in the marker being placed precisely on your store's location.
This being the case, you have the ability to adjust the marker so that is it displayed exactly where you need it.
This is done on the Click & Collect Stores page in Cloud MT:
https://cloudmt.citruslime.com/#/click-and-collect
On this page, you'll see listed the individual stores which exist in your Cloud POS group.
These will be categorised as either Locations Available For Click & Collect, or Locations Disabled/Not Available for Click & Collect, depending on how you have designated these stores in Cloud POS (as described earlier in this article).
In both these sections, you'll see a column titled Edit Location on the grid, and against each store location there is a link titled Update Location:

Clicking on the Update Location link will open up a Google Maps interface. On the map, you can navigate around and move the marker to your desired location:
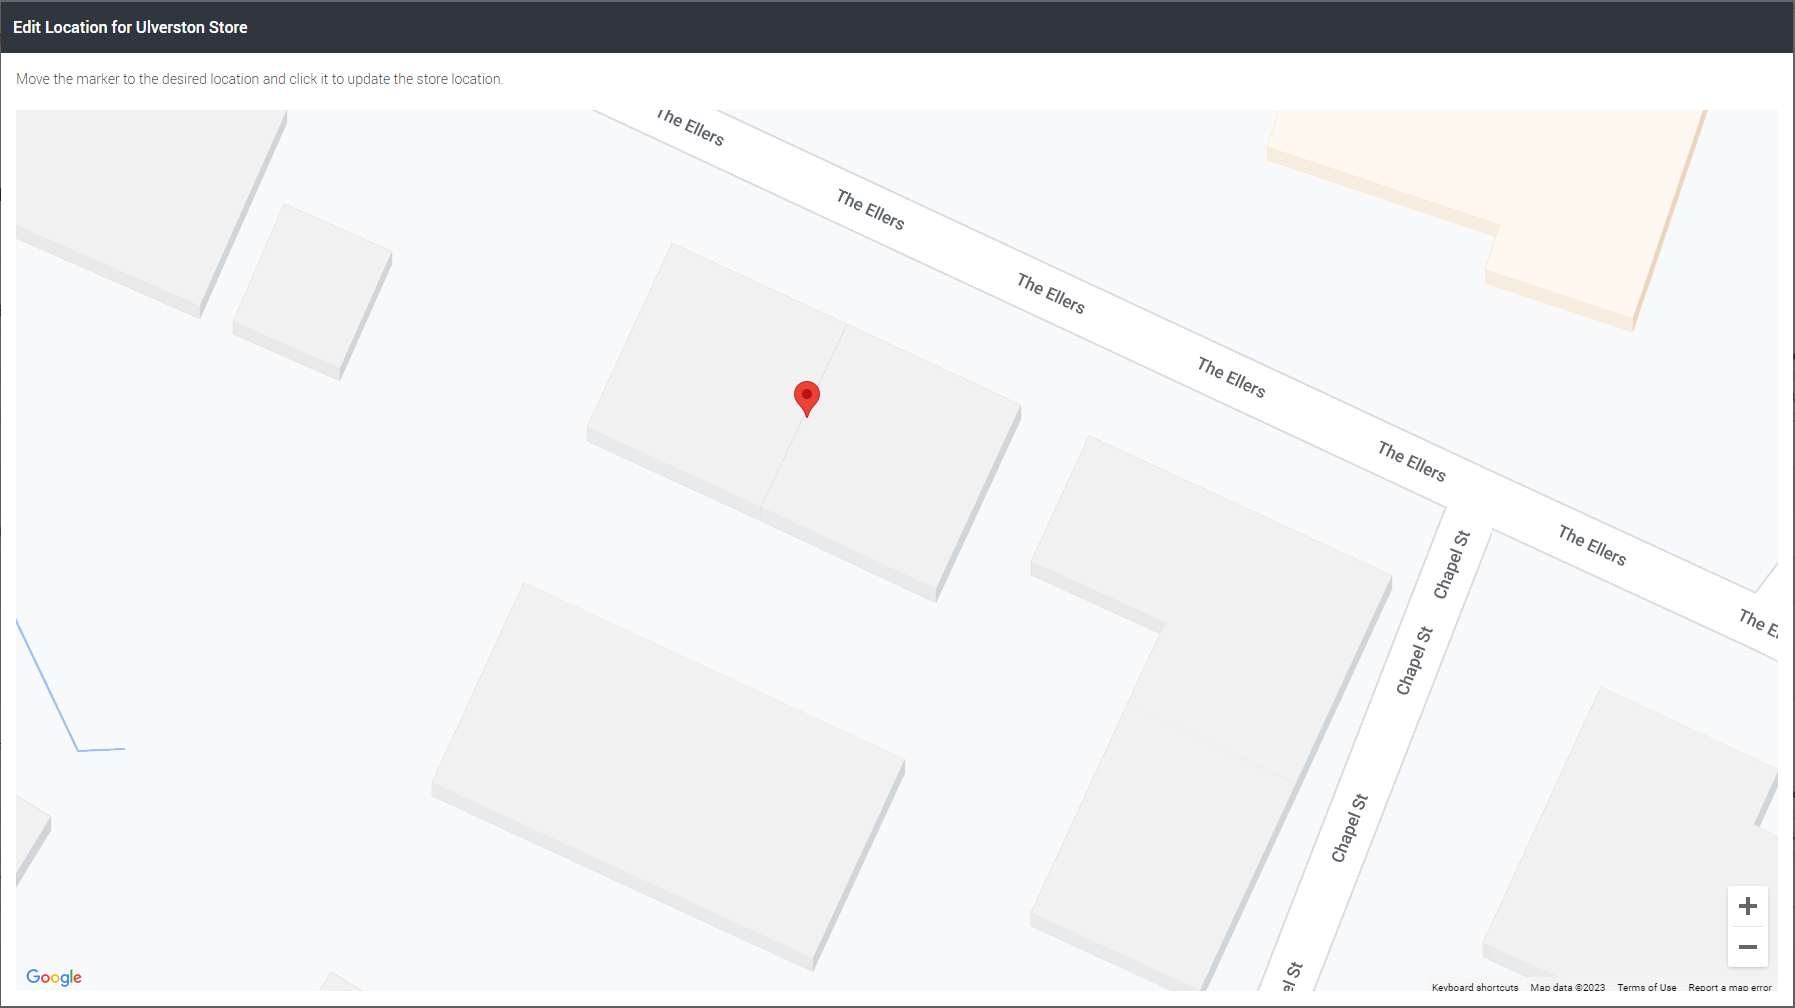
When the marker is where you would like it to be placed, clicking on the marker will save the changes.
When browsing your ecommerce site and view Click & Collect locations, you'll see the marker is now displayed exactly where you placed it: