For the purposes of this article, we will assume that you are already familiar with using the Bike Rental Manager application, and so we will look specifically at how the integration works alongside Cloud POS.
You'll also need to have completed the steps described in this article:
How do I set up Cloud POS to work with Bike Rental Manager?
1) In Bike Rental Manager, go to Reservations, then Create Reservation.
2) Create a new Reservation using the process you would normally follow.
3) When adding the customer, make sure you enter their email address and country code ie. United Kingdom.
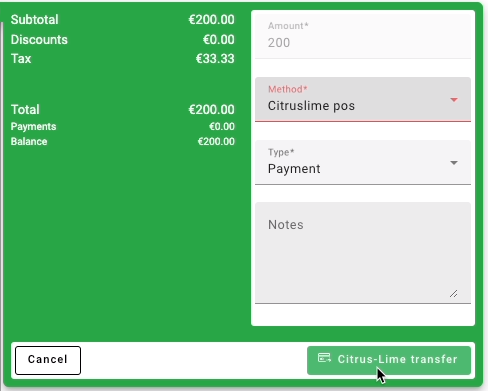
4) At the Payment Option screen, ensure you select Citruslime pos as the Method.

5) Click the button marked Citrus-Lime transfer.
(This action sends the reservation data across to Cloud POS)
6) In Cloud POS, open the Point Of Sale and go to Recall Orders.
Reservations you create in Bike Rental Manager initially appear in Cloud POS as Quotes.
7) Select the Quote which corresponds to the Reservation for which you want to take payment.
8) Click Set Transaction Type, and convert the Quote to a Work Order. This will enable you to tender the transaction.
9) With the quote now converted to a Work Order, tick the box marked Pickup and then click the Tender button.
10) Select the Tender Type the customer wishes to use and complete the transaction.
11) Return to Bike Rental Manager. It can take up to 30 seconds from completing the transaction in Cloud POS to updating the Reservation in Bike Rental Manager.
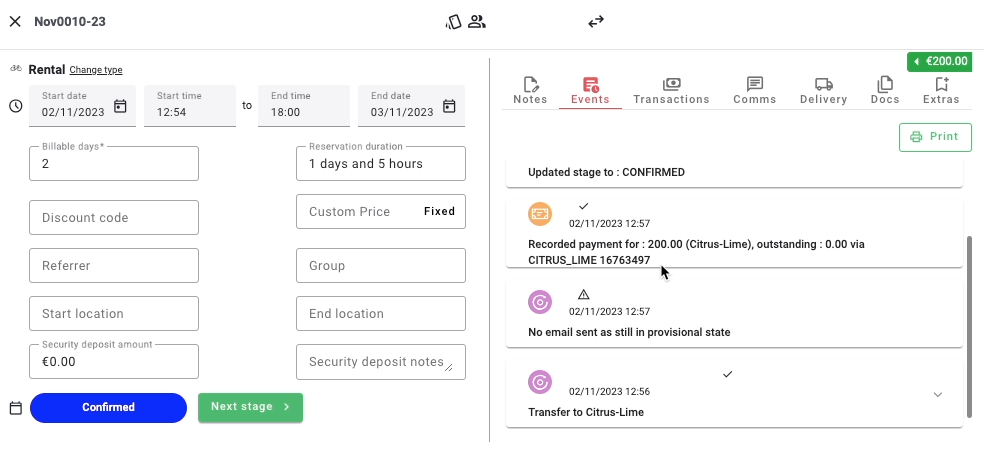
12) Once the Reservation has been updated, it will change on the calendar in Bike Rental Manager from being a black ‘Provisional’ booking to a blue ‘Confirmed’ booking.
If you wish, you can open the Reservation and click on the Events tab. This will show you a timeline of events that took place with the booking:

Bike Rental Manager have also produced their own video guide about the integration between their platform and Cloud POS. You can watch it here: