You can use the Update Item Reorder Levels and Bin Location Wizard to update minimum and maximum levels in bulk.
The first thing to do is select the store you wish to make the changes to:

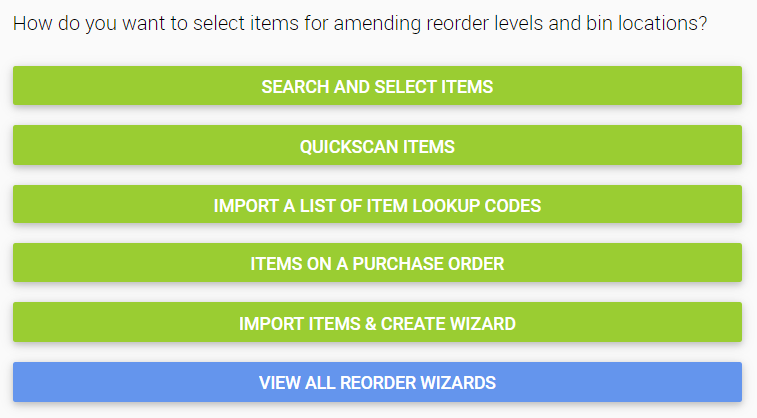
You then need to choose how you wish to add items to the wizard:
In the example below, we have used the Search and Select Items and filtered to find any items with a minimum and maximum level of zero from the supplier Citrus-Lime have been selected:
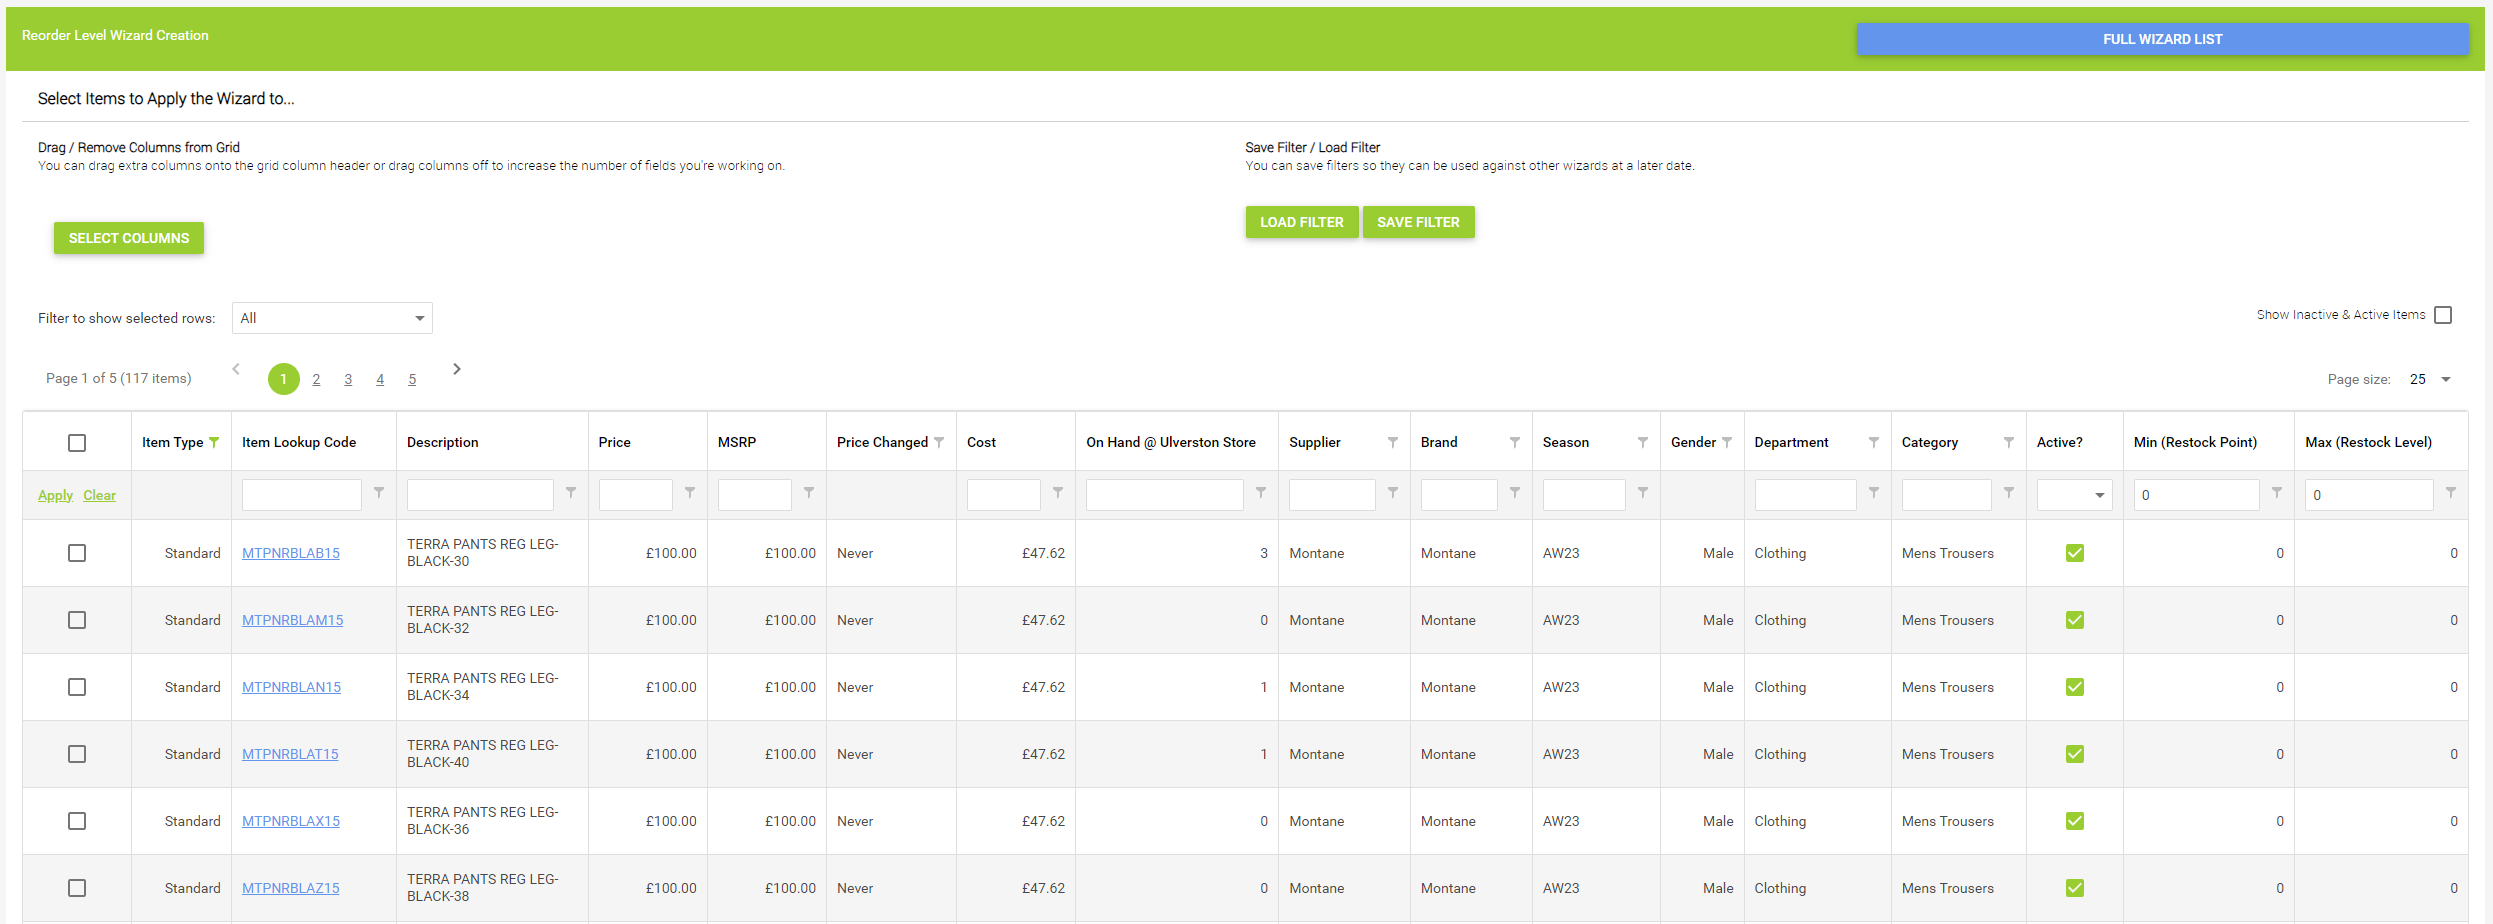
You can now select which items from the filter results you wish to add to the wizard, by ticking the box on the left-hand side next to each item. If you wish to select every item that has been returned by the filter, click the box on the filter heading:
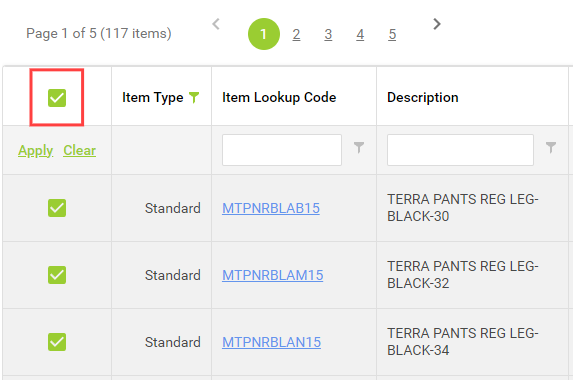
You can then scroll to the bottom of the page, where you will see how many items the wizard will apply to:
Click the Edit Item Levels button and you will move onto the wizard, at which point you can adjust min / max levels by using the Modify All functions (if you want to apply the same setting to every item) or by manually typing into each field:

To help you plan the min / max levels you set, the table displays Sales Within Previous Days, so you can see how well an item has been selling over time and make a judgement on how much stock you should keep available.
After making your changes, scroll to the foot of the page and click the Save Grid Changes button.

Once you've saved the changes and reviewed your work, you can set a time for the wizard to run if required. Unless you specify a date and time, the wizard will run immediately.

Next, click Commit Your Changes, and this will adjust your items accordingly.
Importing a file
If you already know the items you wish to update, you can import an Excel file of the items and create a wizard. This option removes the need to search for the items and allows you to make your pricing updates in Excel rather than Cloud POS.
To use this feature, select Import Items & Create Wizard.
The columns that must be in the file are:
Code
Bin Location
Reorder Point
Restock Level
To aid you in this process, you can click the Generate Empty Template button and this will allow you to download an Excel file which is pre-populated with the mandatory column headers.
Codes can be either Item Lookup Codes, Supplier Part Codes or Barcodes (Aliases), but they must exist in the database. Every column you do not wish to change can be left blank as necessary, to indicate that its value should not be updated.
When you have prepared your file, click on the Browse button to locate it, then click Upload.
Once the file has uploaded, click View Wizard.
You'll now see a grid of the items you've imported. You can use the functionality on the page to make any necessary adjustments, then commit your changes using the same actions as described earlier in this article.