
Before you begin
In order to utilise our MailChimp integration, you require a Citrus-Lime Ecommerce website. Please contact the Success Team if you would like to start with Citrus-Lime Ecommerce.
You will also need to be on a paid Mailchimp plan. The integration with Cloud POS is not supported by the Free Plan.
"Mailchimp helps small businesses do big things, with the right tools and guidance every step of the way. Bring your audience data, marketing channels, and insights together so you can reach your goals faster—all from a single platform."
How to connect your store to MailChimp
Your store can seamlessly integrate with a MailChimp account in just a few short steps, which this article will cover.
If you require any assistance with how to manage and use your MailChimp account, please refer to MailChimp's knowledge base:
Don't have a MailChimp account?
You can create your own account in a few minutes. Sign up here today: https://mailchimp.com/
1) Find/Generate an API Key in your MailChimp account
MailChimp Users with Manager permissions can generate and view their own API (application programming interface) keys. Users with Admin permissions can also see API keys for other account users.
- Click this link to navigate to the API Keys section of your Mailchimp account: Your API Keys
- Click the Create A Key button;
- Name your key descriptively, so you know what application uses that key;
- Copy the key you have just created.

2) Add the MailChimp API to the Cloud POS Back Office
Once you have your API Key, login to the Cloud POS Back office and add your API Key to the configuration settings: https://pos.citruslime.com/backofficeux/configuration.aspx

3) Wait 24 hours for the integration to upload your data
Once you have added the API Key to the Cloud POS Back Office, the integration will automatically begin the upload process to your MailChimp account. After 24 hours, your full Citrus-Lime Ecommerce database will have uploaded to an audience named:
'Citrus-Lime Cloud POS - *Your Store Name*'
https://us1.admin.mailchimp.com/lists/

4) Check your audience settings
Once all data has uploaded to your account, you'll need to make sure your audience information is correct. To do so, head to the audience overview and click on the arrow next to the audience, then Settings: https://us10.admin.mailchimp.com/lists/
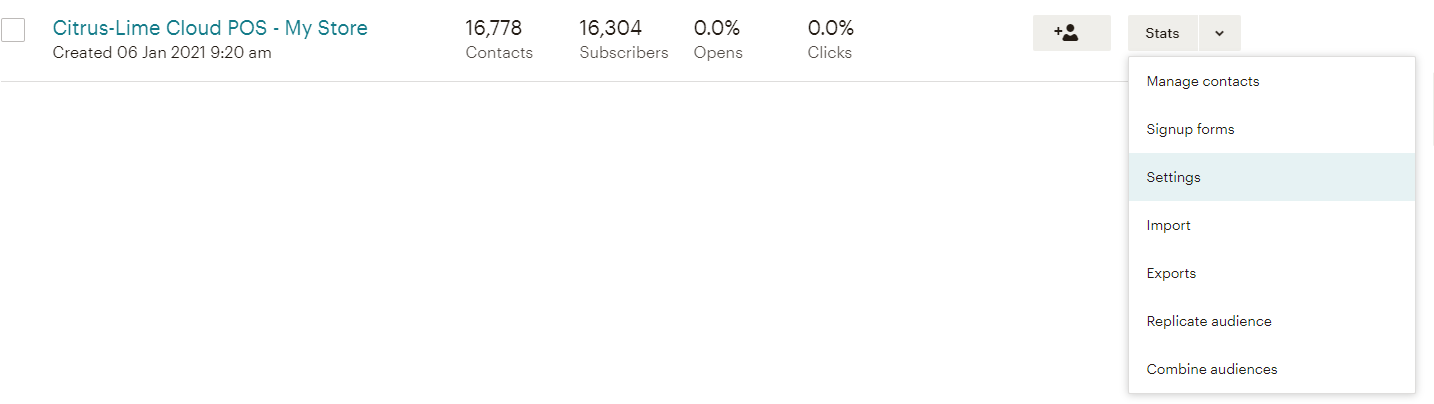
The two areas that will need checking over are:
- Audience name and defaults
- Required email footer content


Make sure all fields in these settings match your store information.
And you're done!
You're now able to start sending campaigns using the audience. MailChimp contains plenty of powerful automated features that can help build your brand. If you're looking for somewhere to start, we'd recommend exploring some of these automations that can generate a good source of passive income once they're live!

Create a Winning Welcome Email
https://mailchimp.com/resources/make-lasting-connections-with-welcome-emails/

Get Shoppers back to their carts
https://mailchimp.com/features/abandoned-cart/
Already have an existing MailChimp account?
If you have an existing MailChimp account, you can still follow the above steps to integrate with Cloud POS. However, it is important to manually move your unsubscribe list and any legacy data in your existing audiences to the new one before you use the data in the audience.
To do so, you'll need to follow the below process.
-
Export your current audience(s)
https://mailchimp.com/help/view-export-contacts/#View_or_export_an_audience
You'll need to do this for every audience in your account. Each export will provide you with different spreadsheets for your audience data, split out by the Email Marketing Status (Subscribed, Unsubscribed, Cleaned). We recommend you keep this data for safe-keeping.
-
Import all audience information to the newer audience
https://mailchimp.com/help/import-contacts-mailchimp/#Import_new_contacts
For each audience, you'll need to follow the import process as specified in the article above. You'll need to do this for each spreadsheet you received for the export, making sure you import to the contacts exactly matching their status (E.g. importing 'Unsubscribed' addresses as Unsubscribed').
-
Bulk Unsubscribe the email address
https://mailchimp.com/help/unsubscribe-people-marketing/#Bulk_unsubscribe
As good practice, we recommend using MailChimp's Bulk Unsubscribe feature to be certain that all unsubscribed addresses have indeed been imported as unsubscribed.
-
Remove the other audience(s)
https://mailchimp.com/help/delete-audience/
To avoid paying more than you need to for you account, we suggest that you only have the one audience in your account. The above guide goes in to detail about how you can do just that - though we'd always recommend that you backup your account data before doing so: https://mailchimp.com/help/export-back-up-data/
Once all audience data has been transferred to the newer audience, you can start sending with confidence. If you require any assistance with this or encounter any issues, please get in touch with our support team.
Frequently Asked Questions
Does my new audience meet GDPR compliancy?
There are two fields on your contacts in Mailchimp that relate to marketing consent: ‘Subscribed / Unsubscribed’ and ‘GDPR Allowed'.
Contacts can only be utilised in MailChimp if they are ‘Subscribed’. When sales are uploaded from Cloud POS to MailChimp, we will set the customers as ‘Subscribed’ by default. This is considered ‘soft consent’ and allows you to make use of this contact in your MailChimp account.
There is a separate field in Cloud POS for ‘GDPR Consent’. This is a ‘hard consent’ and can be opted in / out. When this is uploaded to MailChimp, you'll see it reflected as 1, 0 or blank:
- 1 = This indicates that the GPDR Consent box in Cloud POS has been checked — a customer has given you their unambiguous consent
- 0 = The customer has specifically opted out of email marketing and does not wish to be marketed to
- Blank = The customer has uploaded without any preference (e.g. basket abandonment)
If you prefer, you can choose to only market to customers who have given you this explicit consent — you're able to create segments in your audience to target contacts before sending your campaigns. For example, you could choose to only send to customers with GDPR Consent = 1.
Here are some further scenarios and outcomes, to help you to understand how your customers' behaviour will impact their contact records in MailChimp:
Scenario: You create a new customer in Cloud POS and complete a sale for them.
Result: They upload to MailChimp as ‘Subscribed’. GDPR will be blank.
Scenario: A customer makes their first online purchase. They don't opt-in to marketing at the end of the checkout and they don't create an account for next time.
Result: They upload to MailChimp as ‘Subscribed’. GDPR will be blank.
Scenario: A customer makes their first online purchase. They don't opt-in to marketing at the end of the checkout, but they create an account on your site for next time.
Result: They upload to MailChimp as ‘Subscribed’. GDPR will be blank.
Scenario: A customer makes their first online purchase. They choose to opt-in to marketing at the end of the checkout and they create an account for next time.
Result: They upload to MailChimp as ‘Subscribed’. GDPR will be ‘1’, i.e. explicit consent.
Scenario: A customer subscribes to your newsletter on your website.
Result: They upload to MailChimp as ‘Subscribed’. GDPR will be ‘1’, i.e. explicit consent.
Customers can also unsubscribe from your communications at any time, by following the link at the bottom of the emails they receive from you. This will mark them as ‘Unsubscribed’ in MailChimp, regardless of their status in Cloud POS. They cannot be marketed to in future.
You can read more about Citrus-Lime and GDPR here: GDPR and You (and Us)
I have an existing account but my new audience isn't uploading.
MailChimp offer different levels of accounts, mainly dependent on your audience size. Most plans also have a maximum audience limit. If you're reached the limit with your plan, you will see this message on the audience overview plan: https://us14.admin.mailchimp.com/lists/

If you see the above message, you'll need to export and remove the audience before the new audience can upload. Follow the steps in 'Already have an existing MailChimp account?', but remove the audience before you begin the import.
Other common issues:
- Does your API key match in both your MailChimp account and Cloud POS Back Office?
- Is your MailChimp account suspended?
If none of the above apply, please contact the Citrus-Lime support team for further investigation.
I have existing automations on my older audiences — what should I do?
You'll need to switch these automations over to the new audience. To do so, you'll need to create a new automation and target the newer audience instead. Luckily, you can quickly save any automated emails as templates to then import into your newer automations:
