If you have a Citrus-Lime Ecommerce site, you'll find that when a customer successfully places an order online, this will automatically download to the Cloud POS Back Office. You will need to tender the order in the Point of Sale when you are ready to despatch the order, or when the customer visits the store to collect their item(s).
In this article, we look at how to process a web order in the Point of Sale.
We also have a video guide to processing web orders on our YouTube channel:
Where do I find web orders in the Point of Sale?
Orders placed on your Ecommerce site will automatically download as Special Orders. To find these in the Point of Sale, click the Recall Orders button:

You will see a list of all open orders at this store. This will include Special Orders, Workshop Jobs, Layaways, and Quotes.
All web orders download with a reference 'Web Order No. XXXX', so you may find it helpful to type 'web' into the Reference field to filter for online orders only:
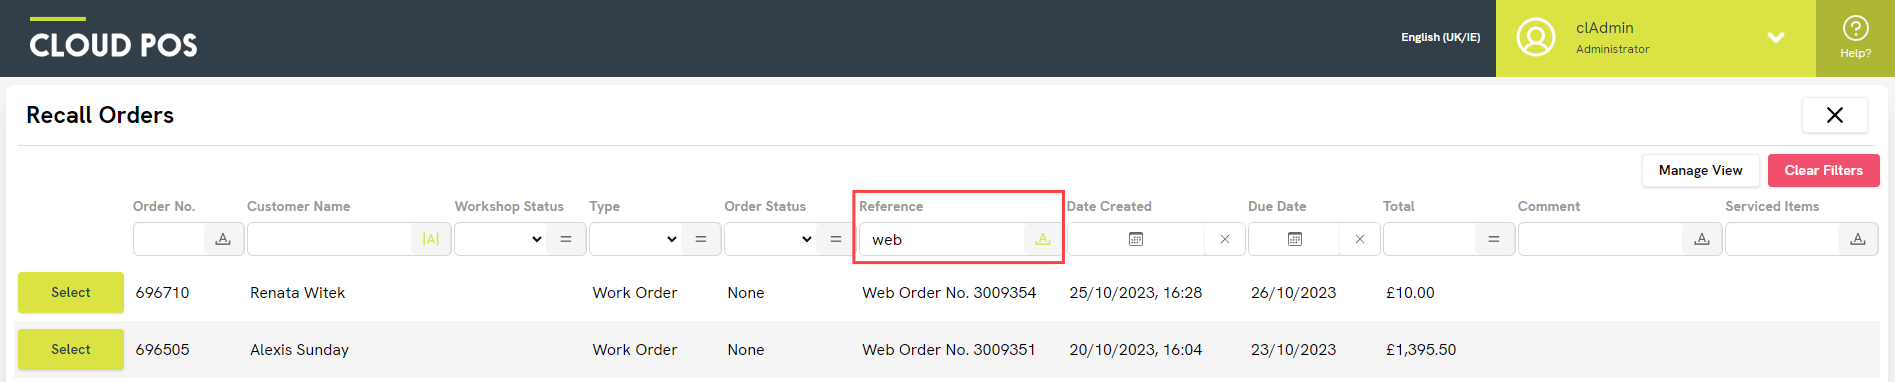
To recall the Special Order, you can either use the green Select button on the left of the row or double-click the row in the grid.
Top Tip
There are other ways to recall web orders. You can scan an item that is included on the order into the ‘Scan to recall open order’ search field on the main Point of Sale screen. This is useful if you've already picked the stock from the shelves. You can also type the order number into that field, if you are working from a Pick Sheet, for example. Another option is to scan the order barcode (for example, if you are working from a printed order receipt).
Scan Items for Pick-Up (Optional)
If you're already familiar with Special Orders created in-store, then you'll notice a difference when you recall a web order. Instead of viewing the order in the Point of Sale screen, you're presented with the Scan Items for Pick-Up window.
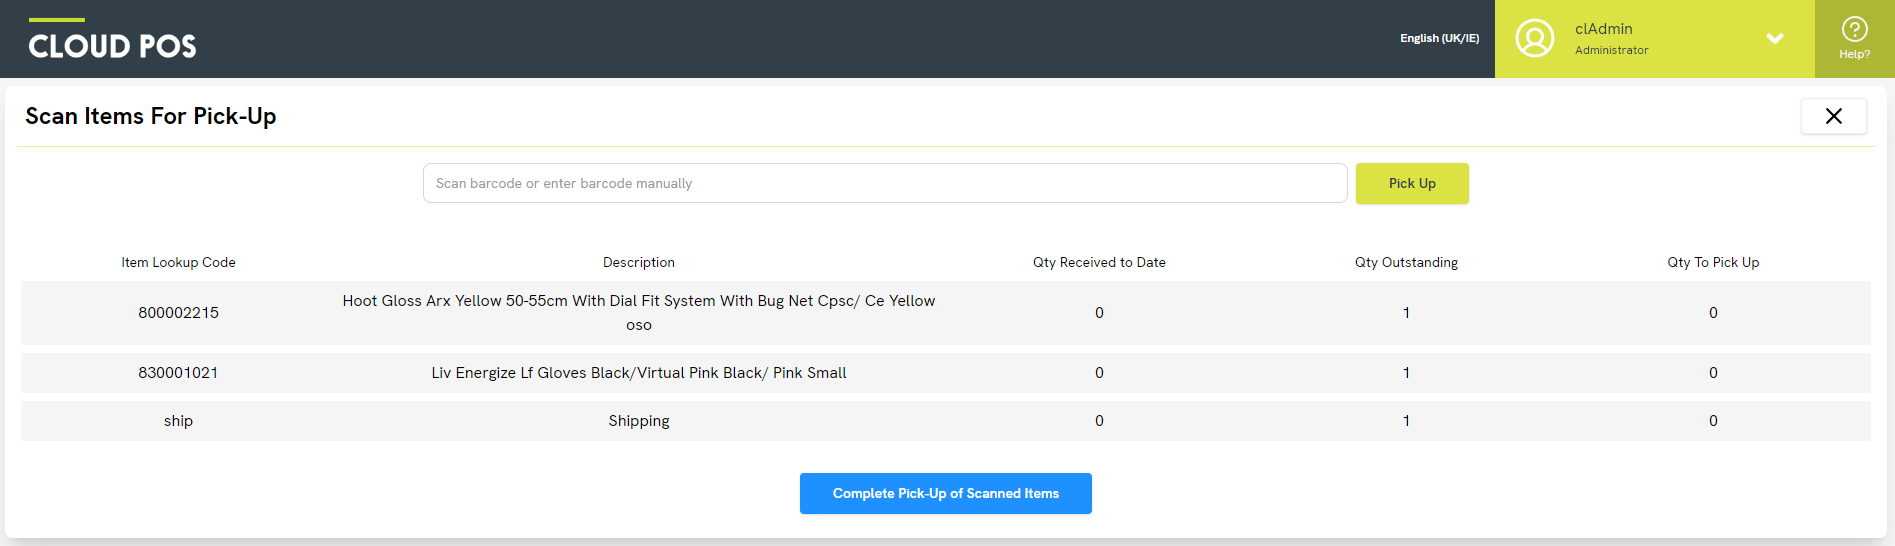
Here, you have the option to scan the items on the order, to ensure that you are providing the correct items to the customer.
Using this functionality is entirely optional.
As you scan an item with your barcode scanner, the corresponding line will be highlighted in green and the Qty to Pick Up value will update by the quantity you have scanned:
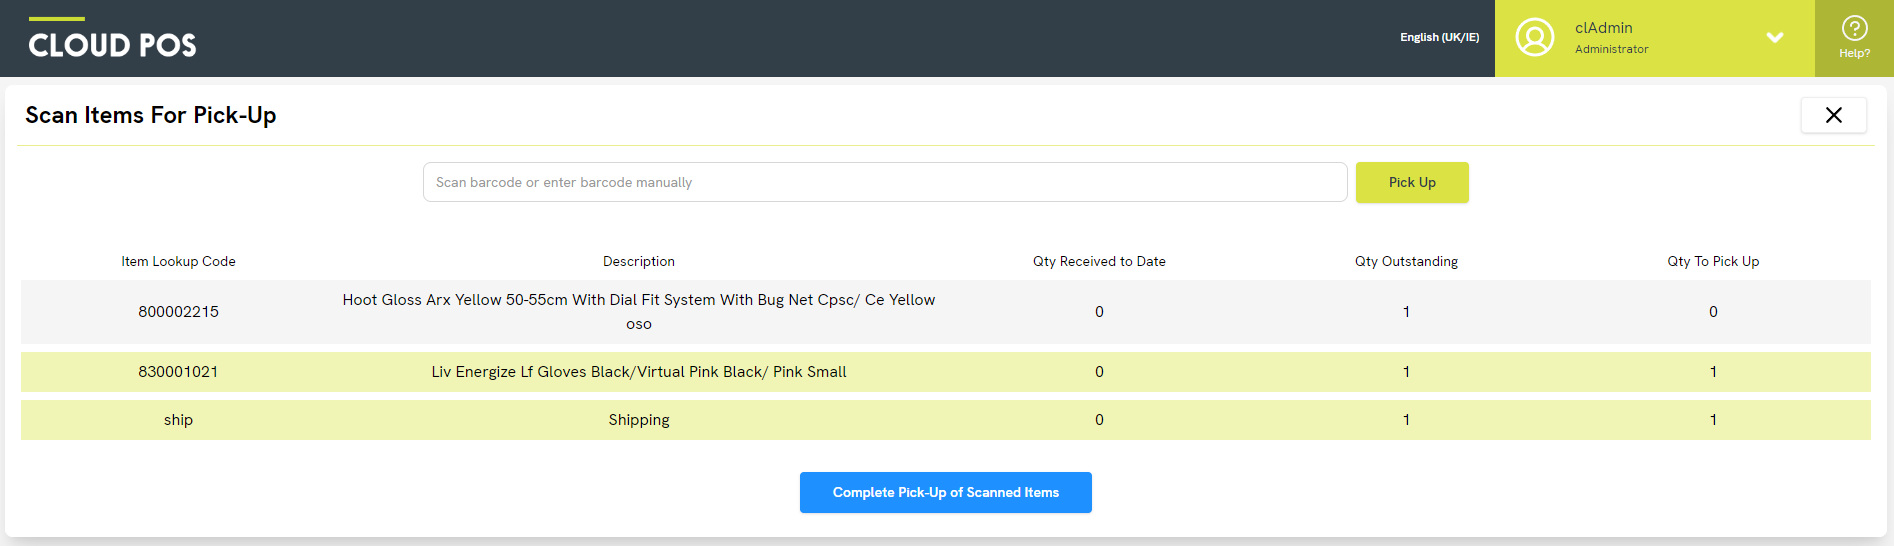
You do not need to scan non-inventory items such as shipping — these will be highlighted automatically as soon as another item is successfully scanned.
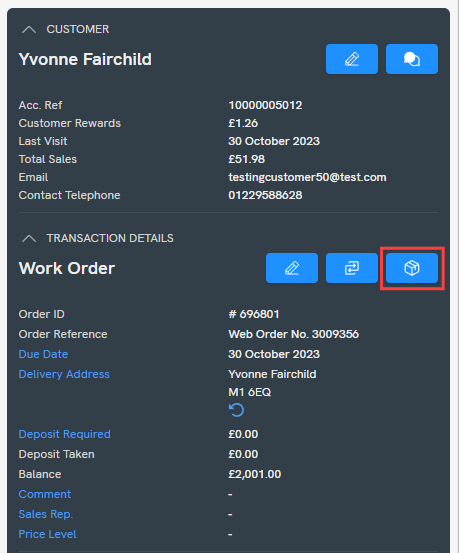
Once all lines are highlighted, you will be taken to the Courier Integration window.
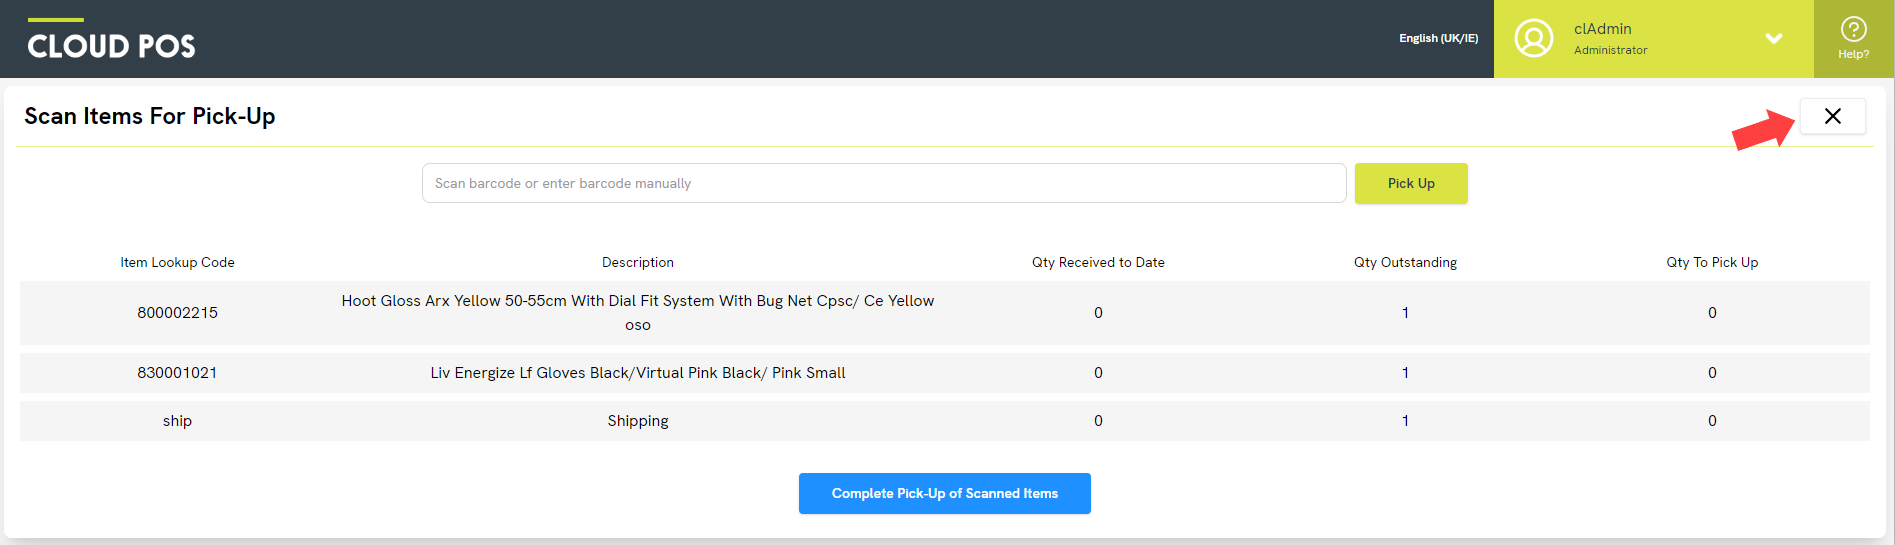
If you do not wish to scan the items, you can skip using the cross symbol in the top-right corner, which will return you to the Point of Sale screen.
Printing a shipping label (Optional)
If you choose to scan your items, once all lines have been successfully highlighted, you will be taken automatically to the Courier Integration window.
If you skipped scanning your items, you can access this window by clicking the Print a courier label button in the transaction summary panel:
You will need to have integrated courier services to be able to print a shipping label. If you only have offline services which are not integrated with a specific courier, it is not possible to print a generic shipping label from within Cloud POS.
Integrating your couriers with Cloud POS
If you'd like to find out more about integrating your couriers with Cloud POS, so that you can easily generate and print shipping labels for your parcels within the Point of Sale, please speak to your Success Team. You can give them a call or drop an email to success@citruslime.com.
The Shipping Address & Service tab will be automatically populated with information from the downloaded order. It is a good idea to double-check this information before proceeding.
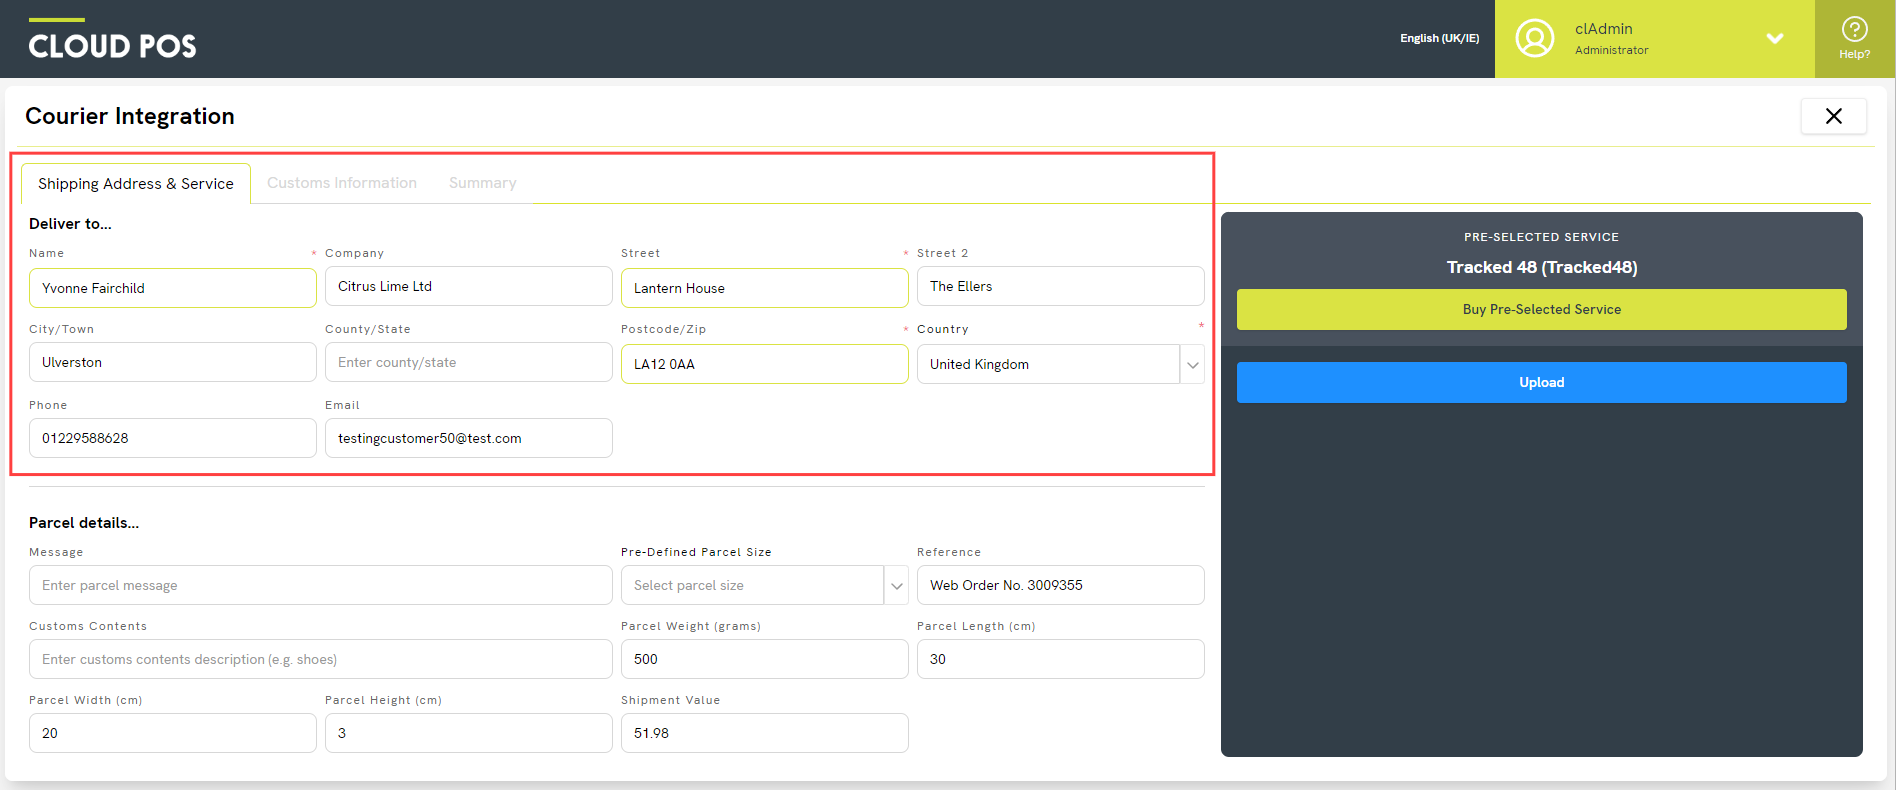
The customer will have selected a delivery service during their checkout process. This will be shown under the Pre-Selected Service area:

If this service is linked with one of your integrated couriers, and you wish to proceed with this service, you can click the Buy Pre-Selected Service button to generate a label.
Alternatively, you can use the Upload option to manually select a service. The dimensions and weight of the shipment will dictate which courier services you can use. If you need to amend those shipment details, you can do so on the left of the screen in the Parcel details… section. Just note that if you change any of these details, you will need to click Upload again to see the correct service options.
Once you have selected the shipping service you wish to use, click the Buy Label button.
The label will print from the courier label printer which is associated with your current register.
Please Note
In order for your label to automatically print, you will need to have the Courier Label Application running on the PC that is connected to your courier label printer (via a USB cable). Please refer to this article if you are unsure if you have this application open: Courier Integration - Label Printing Application
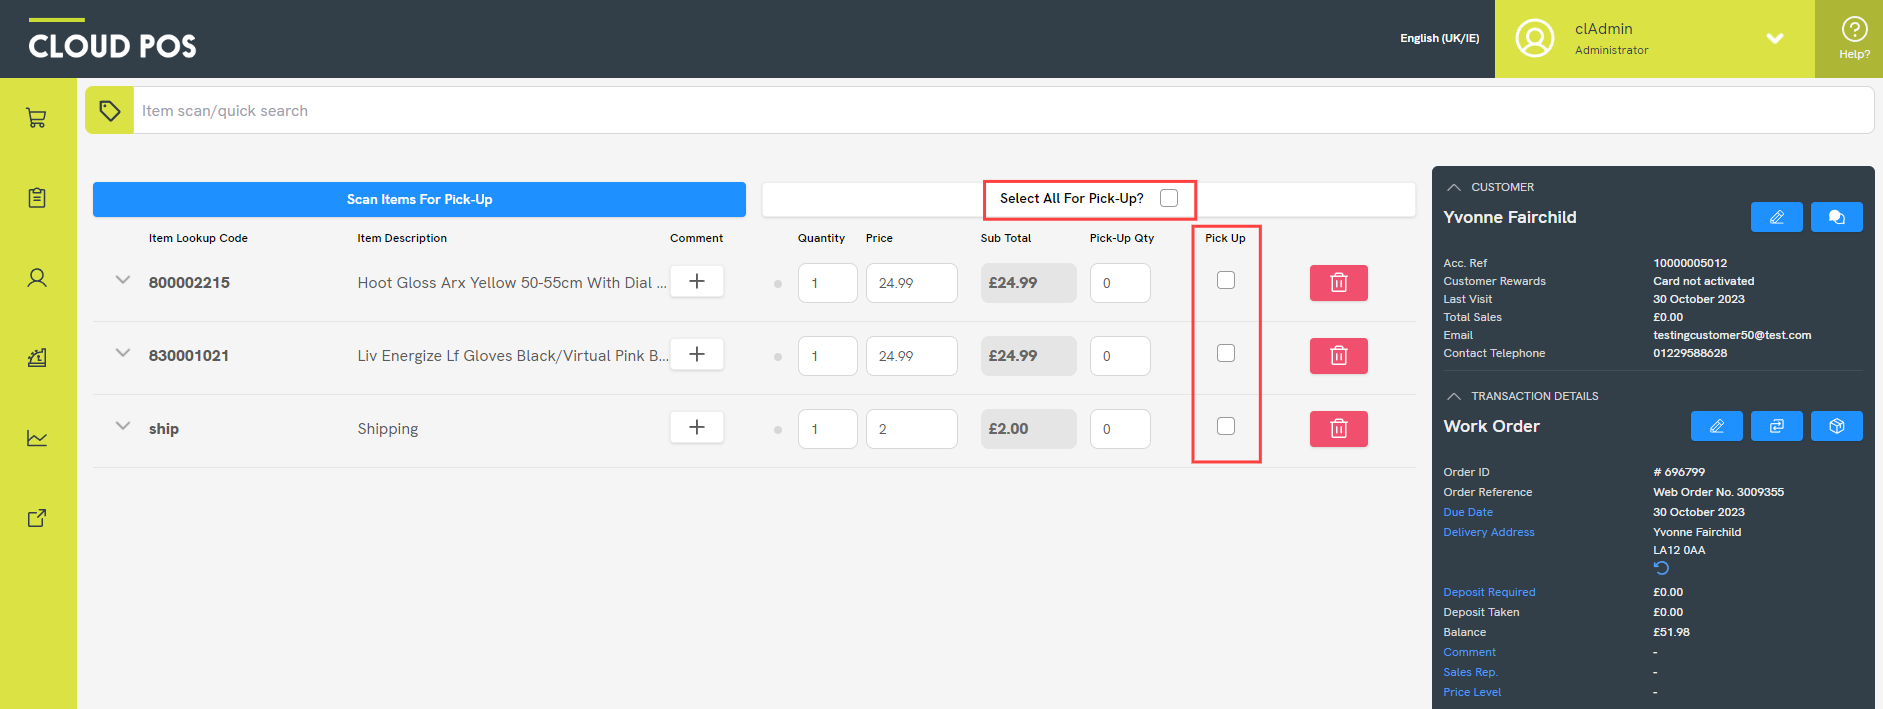
Picking up the items on the order
If you have previously scanned the item(s) for despatch or collection, you will find that the Pick Up boxes beside your item lines are already selected, and you can skip this step.
Otherwise, you will need to manually tick the Pick Up boxes to indicate which items are being despatched or collected at this time.
You can use the Select All For Pick-Up option if all items are being despatched or collected.
Tendering the transaction
Click the Tender button to proceed to the Tender Transaction screen.
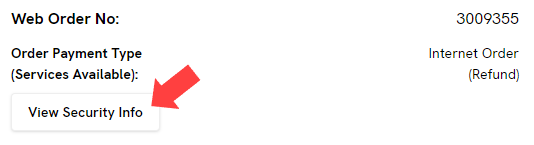
You'll see that the value of the transaction is already populated in the tender field that corresponds to the payment method used by the customer:
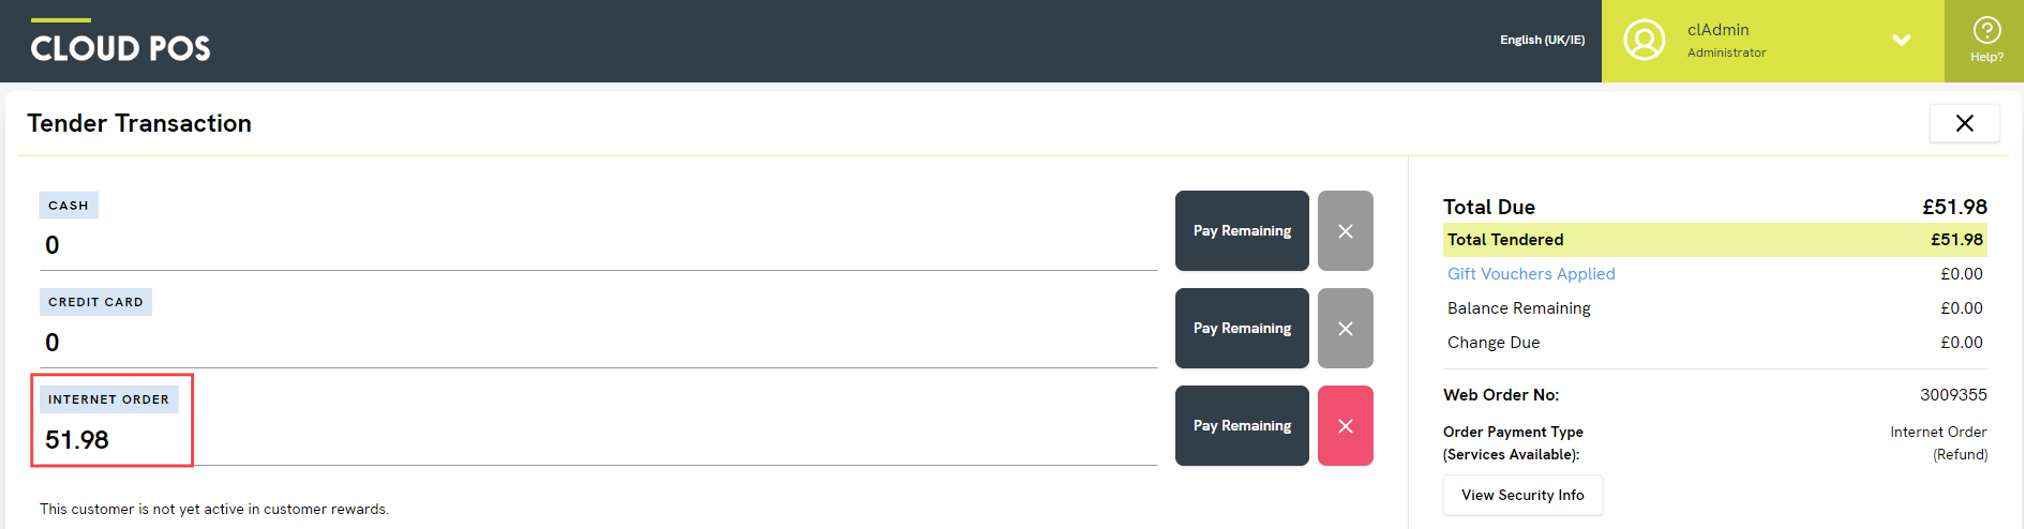
In the example above, the customer has paid by credit card or debit card, so the Internet Order tender type is automatically populated. If the customer had paid by PayPal, that tender type would be populated instead.
At this point, it is recommended that you click the 'View Security Info' button and review the information that is displayed:
(The security checking rules you have in place on the payment method will dictate the results you see here, but an order will not complete on your Ecommerce site if the security checks you have specified are not passed.)
Warning: PayPal statuses
For PayPal orders, the status will show in the order comments as either ‘PayPal status = COMPLETED’ or ‘PayPal status = COMPLETED-PENDING’. If it says ‘COMPLETED-PENDING’, this means PayPal are carrying out further fraud checks on your customer. You will see these transactions marked as ‘On Hold’ in your PayPal account. We would not recommend tendering these orders until you can see in your PayPal account they have been released from that hold and the payment is fully complete.
Tip: You could set the order status ‘Fraud Check' on the order, while you are waiting for those further checks to be completed.
For more guidance on order statuses, please refer to this article: How do I create a customer order or quote?
Click the Continue with Transaction button to proceed.
On the following screen, make your selections from the options to print a receipt, pop the cash drawer and send an e-receipt. (Please note that the customer will already have received an order confirmation email when they checked out online.)
Finally, click Complete Transaction to finish processing the order.
Frequently Asked Questions
Can I change the items on the order?
If a customer asks to amend an item on the order, or you need to swap an item for an alternative product, you can follow the guidance in this article: How do I exchange items on an Ecommerce order that I've not yet processed?
How do I cancel an order?
If you need to remove one or more items from an order before despatch/collection, or cancel an entire order before despatch/collection, please refer to this article: How do I refund an Ecommerce order?
How do I change the delivery address on the order?
If you need to change the delivery address for an order, you can manually adjust the fields in the Courier Integration window, or you can access the customer's previously saved delivery addresses by following these steps:
1) Close the Courier Integration window.
2) In the transaction summary panel, click the blue text Delivery Address. This will show a list of any delivery addresses saved on the customer's record.
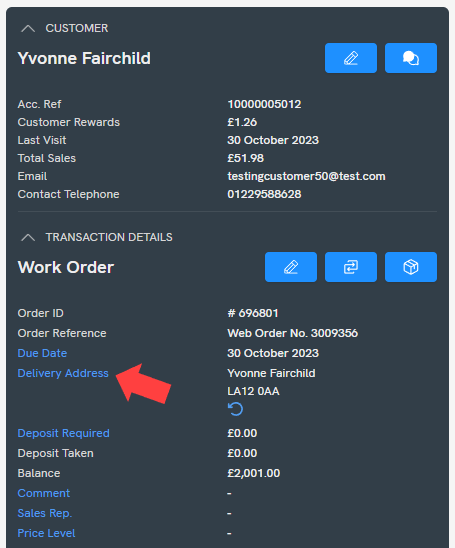
3) Use the green Select button or double-click the row in the grid to select a delivery address. (If you need to add a new delivery address, click the blue button ‘Edit Delivery Addresses’. You can now add a new delivery address, and edit existing addresses.)
4) Click the Print a courier label button to return to the Courier Integration window. The chosen address will now be set.
Can I split these tasks between different staff members?
Yes, if you wish. For example, some stores operate a process whereby one staff member picks the items and packages the orders, and someone else is responsible for using Cloud POS to tender the orders and print the courier labels. If you'd like to follow a process like this, please refer to the following article: How can I process web orders on behalf of my warehouse team?
