This article will cover the use of the Customer Account functionality. This enables customers to purchase items ‘on account’, which they will then settle with you at a later date. It also allows you to process refunds to a customer's account — in other words, providing them with a refund in the form of store credit instead of a cash/card refund.
You can view your customers' account statements in the Cloud POS Back Office (individually or in bulk), and you can also email statements to customers (again, individually or in bulk) to prompt them for payment. This would usually happen on a monthly basis.
In order to access the Customer Account functionality for a customer in the Point of Sale, they first need to be assigned an Account Type in the Cloud POS Back Office. You will not find the Customer Account functionality enabled for all customer records as standard.
Preparation: Assigning the Account Type in the Back Office
In the Cloud POS Back Office, navigate to Customers, Receipts & Orders > Customers. This will open your current customer database.
If you are selecting an existing customer, search for their record and click View/Edit.
If you need to create a new customer record for this purpose, you can follow the instructions in this article: Creating a new customer in the Cloud POS Back Office
Once you have opened the customer record, scroll to the bottom of the page and locate the Account Transactions section:
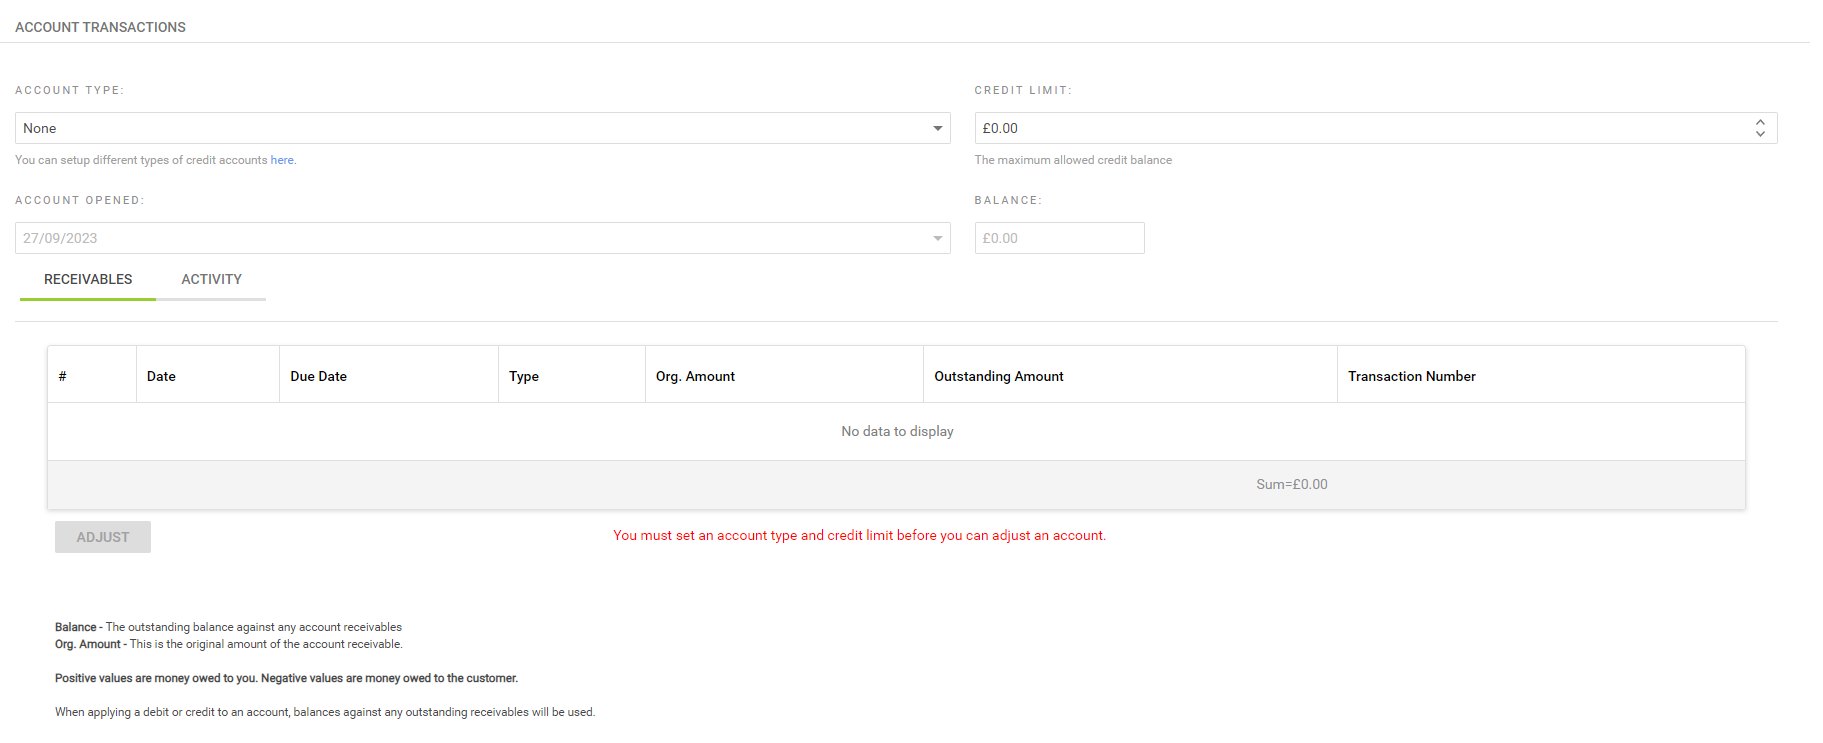
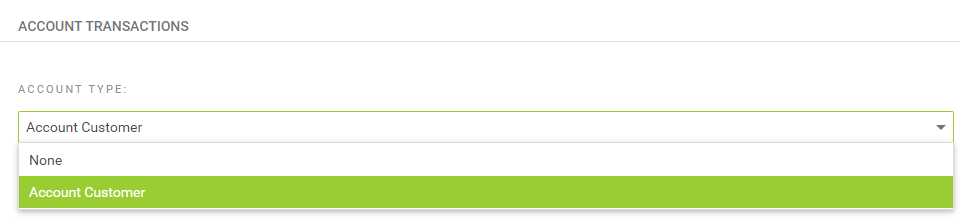
In the Account Type field, select the type you wish to assign:
If you do not have any Account Types created yet, follow the instructions in this article: Creating a New Customer Account Type
You also need to set a Credit Limit on the account. This will be the customer's maximum allowed credit balance:

Once these two steps have been completed, click Save on the customer record.
Tendering purchases to a Customer Account
Once a customer has an Account Type assigned, you will be able to tender transactions to their account. This means instead of paying for their goods with cash, card and so forth, they can ‘store’ the payment on their account and settle the balance later. They may do this in one payment, or they can pay their balance in installments.
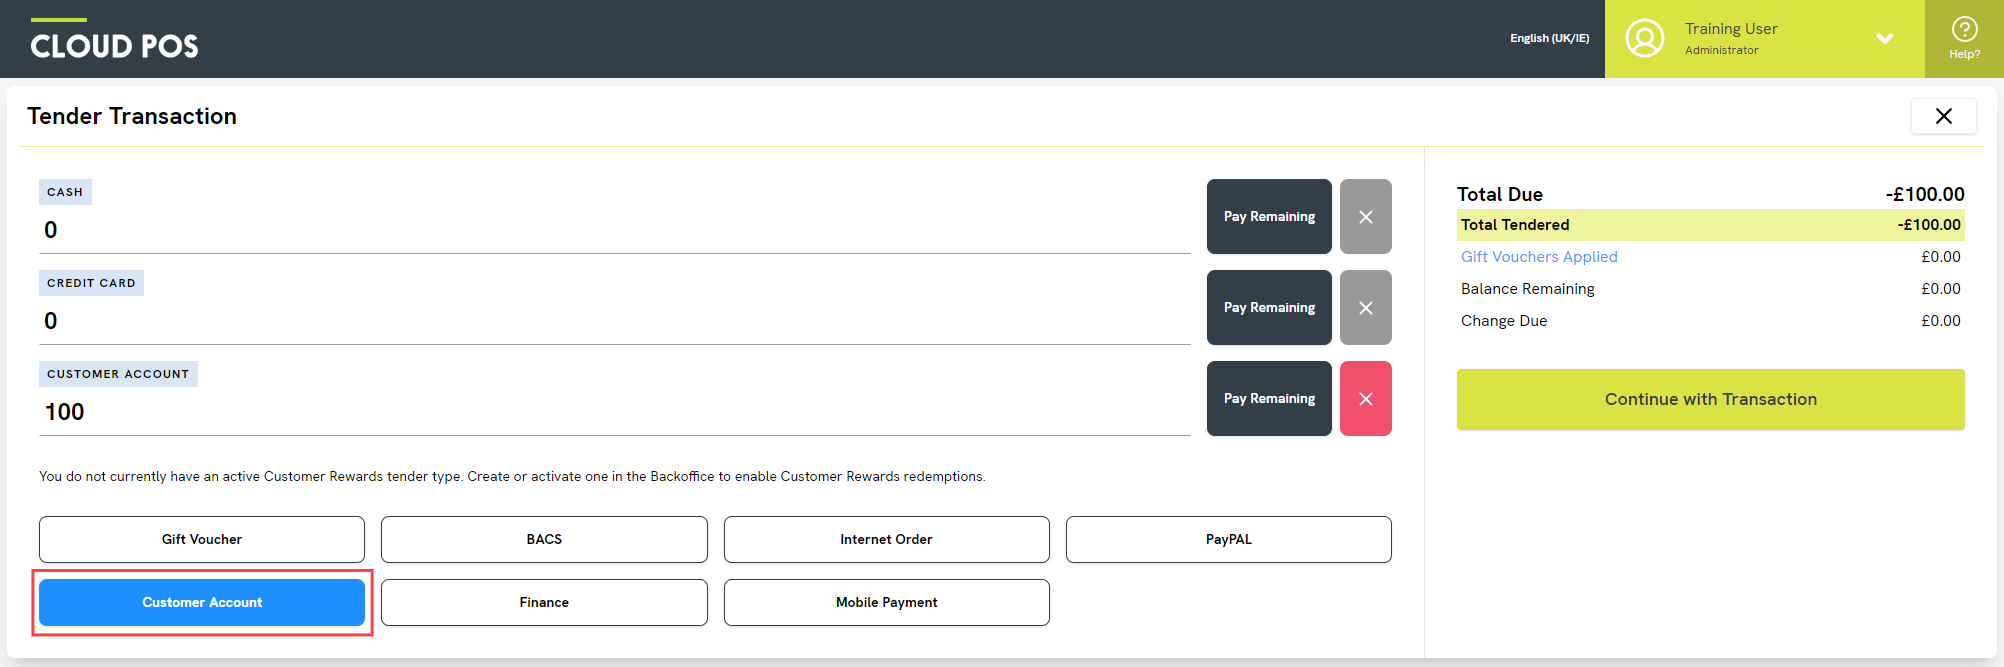
When you reach the Tender Transaction screen, you will see an additional tender type button for Customer Account:
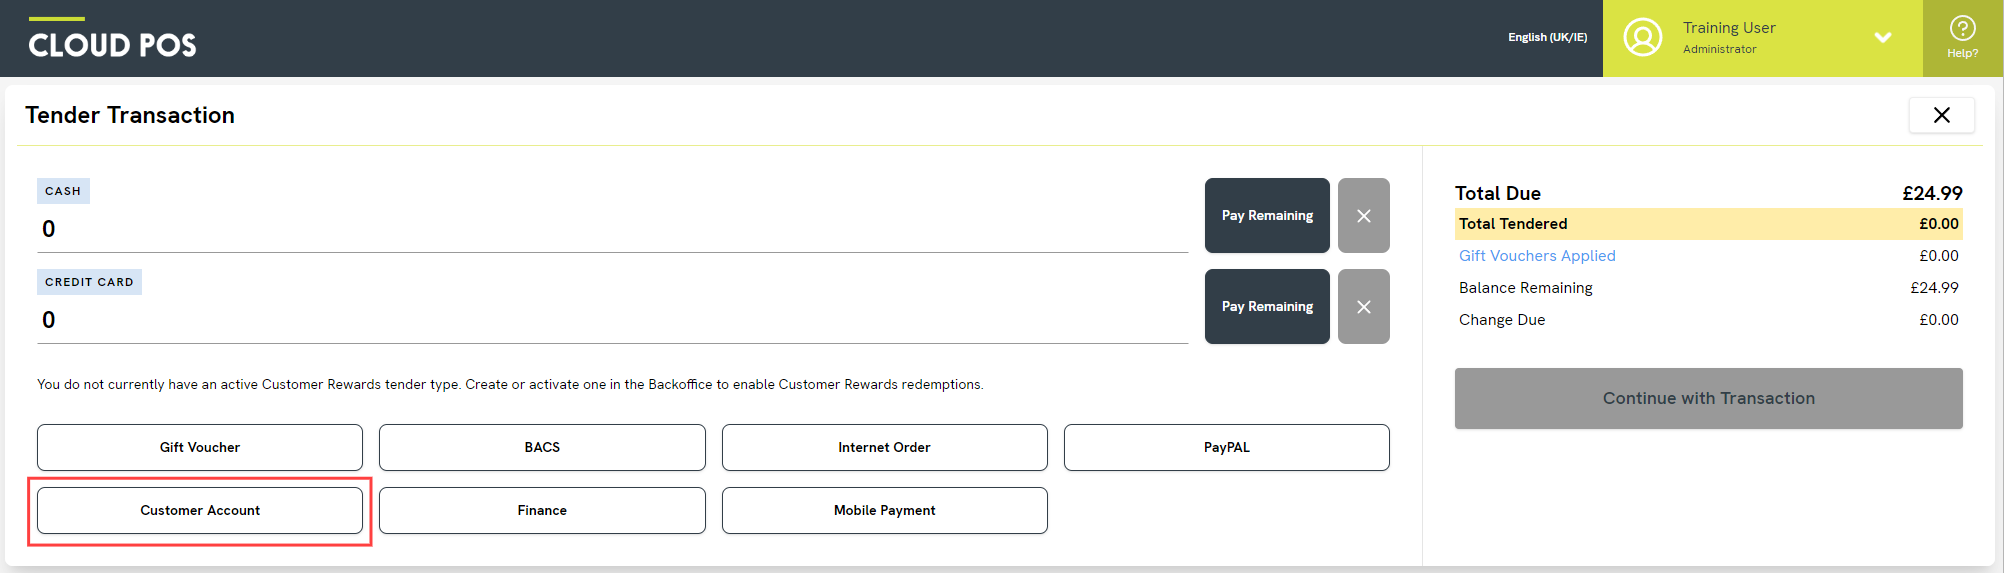
Please note that you will only see this tender type if the customer has an Account Type assigned in the Back Office. If this is not the case, please refer to the section above.
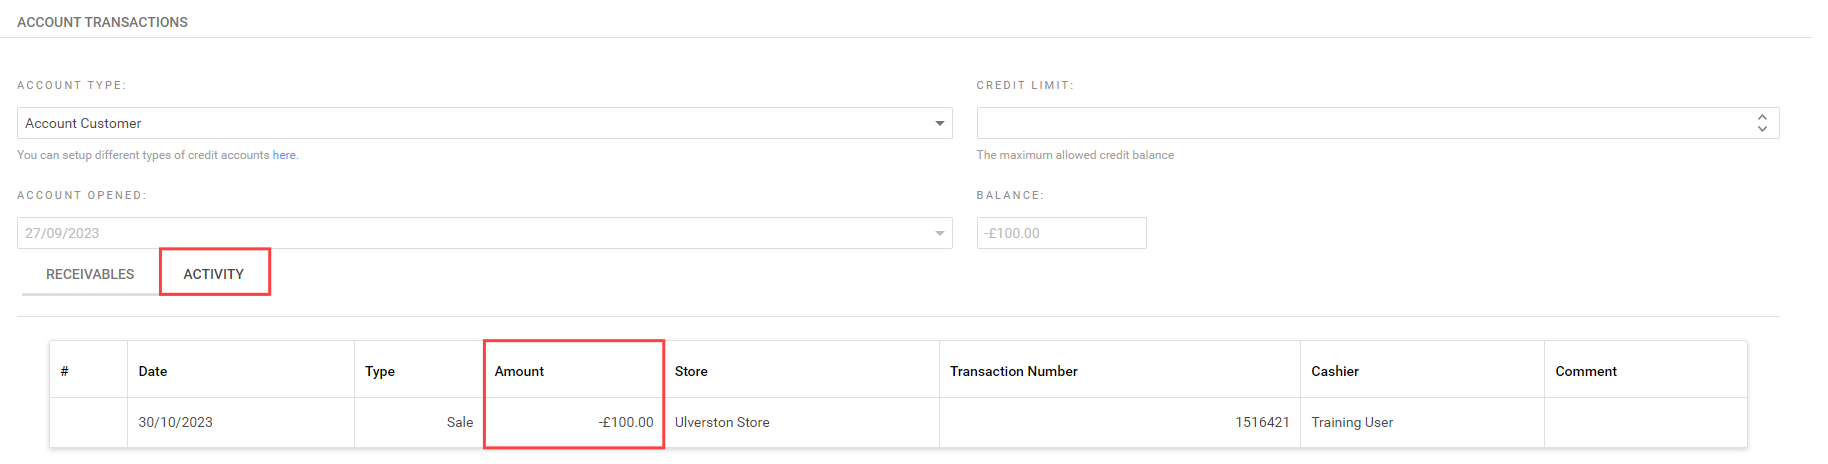
Once you have completed the transaction, it will appear as a ‘Sale’ in the Account Transactions area of the customer's record in the Back Office:
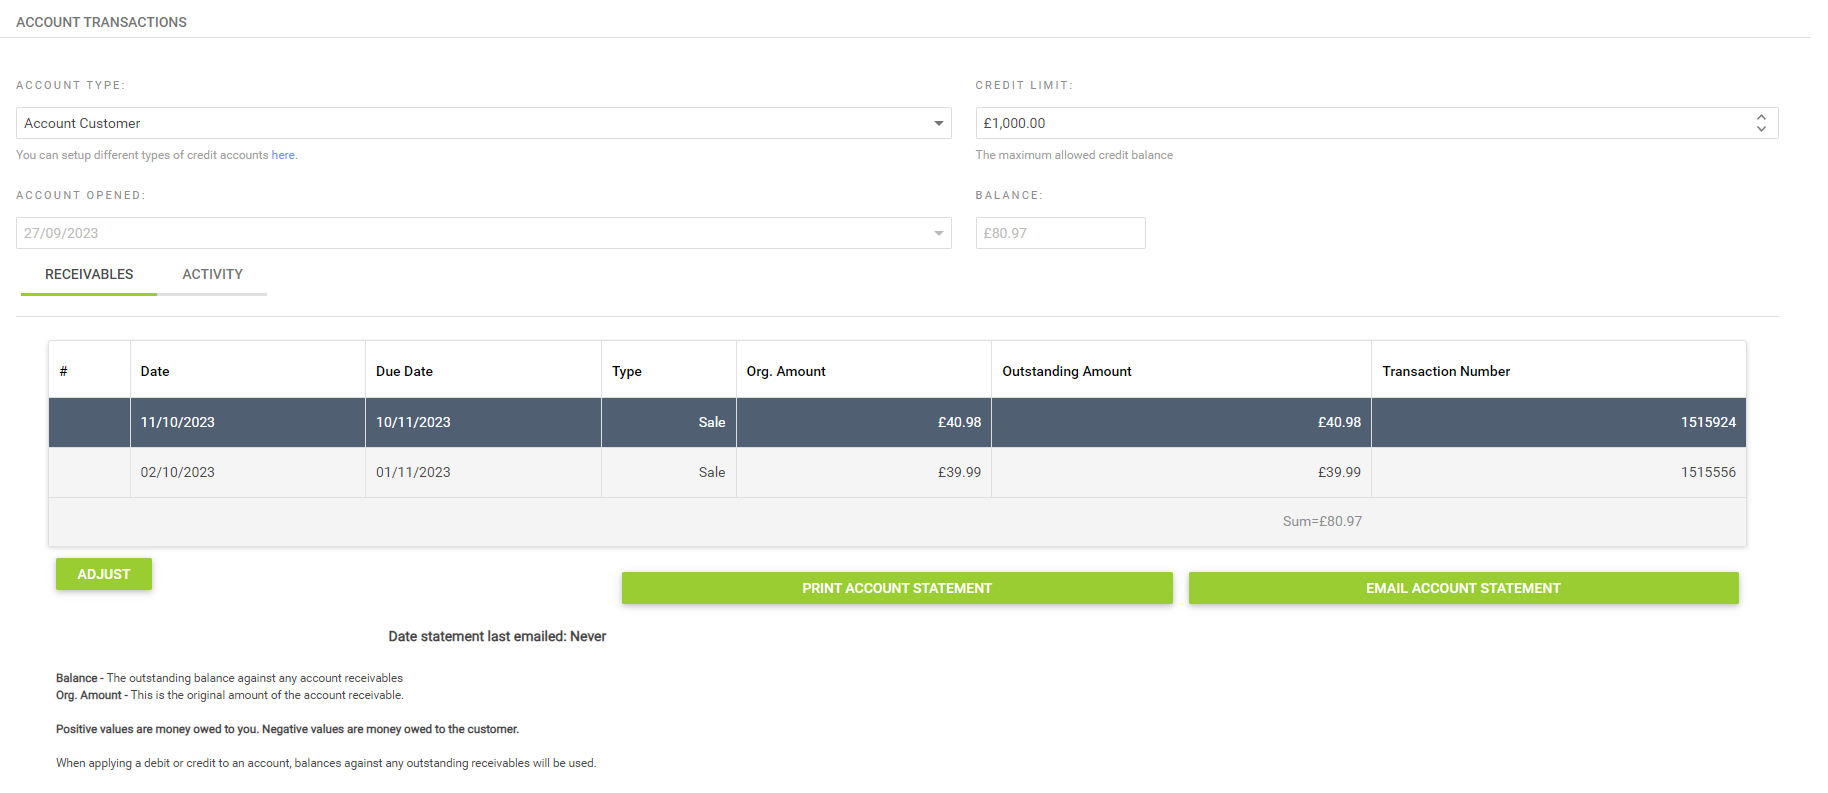
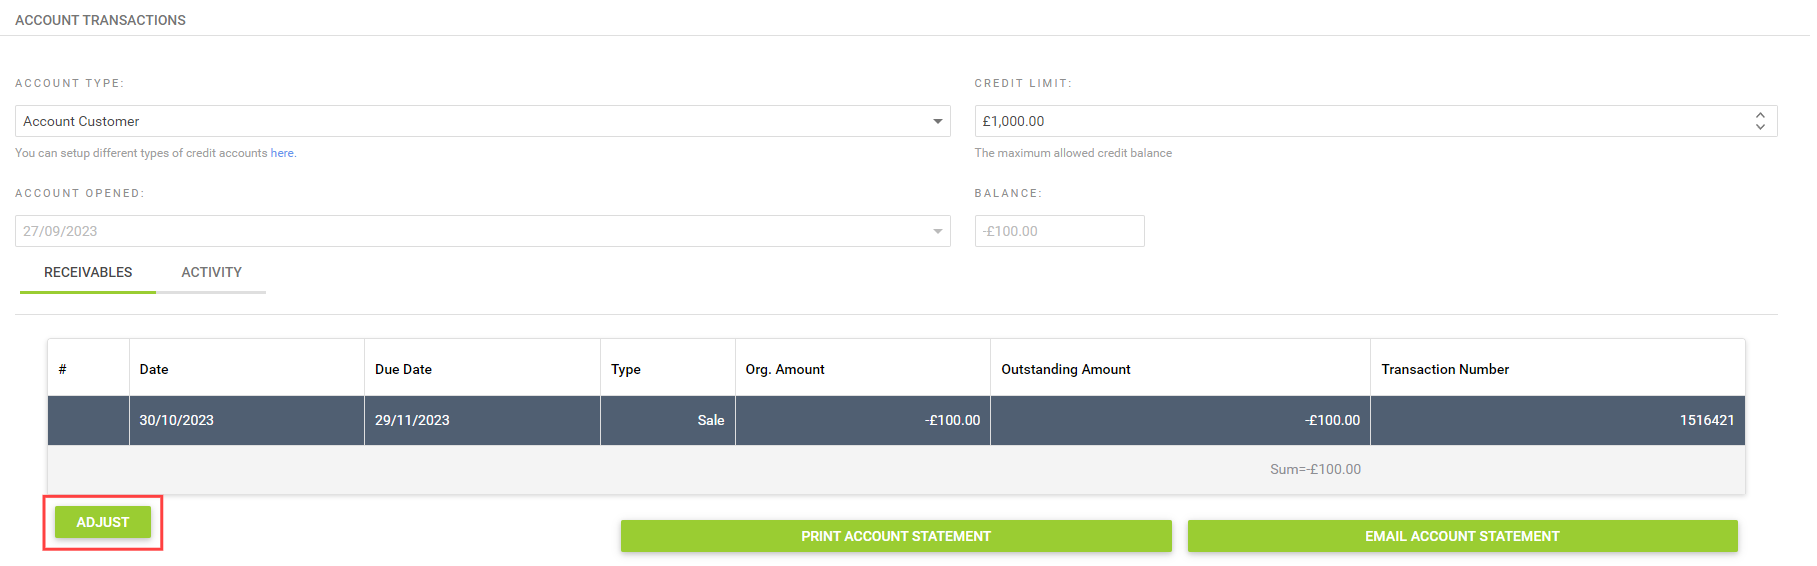
The Receivables section shows a summary of the transactions tendered to the account, with the current Outstanding Amount due against each one.
The Activity section breaks the account activity down into each tender and payment that has been made against the account.
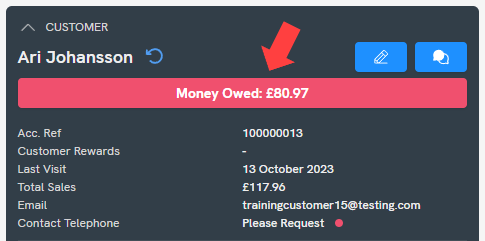
If a customer has an owing balance on their account, this will be highlighted in the Point of Sale whenever they are set as the customer. This is seen in the transaction summary panel:
Making a payment to settle a Customer Account
When your customer is ready to make a payment to settle their account balance (partially or in full), you first need to set that customer in the Point of Sale.
There are now two ways to access their Customer Account.
The first option is to click on the Money Owed notification in the transaction summary panel:
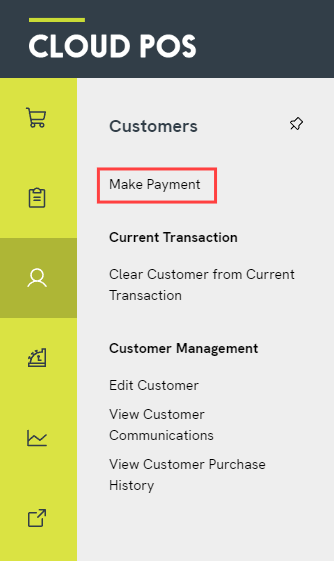
The second option is to click into the Customers menu and then click Make Payment:
Both flows will open the Customer Account Details screen.
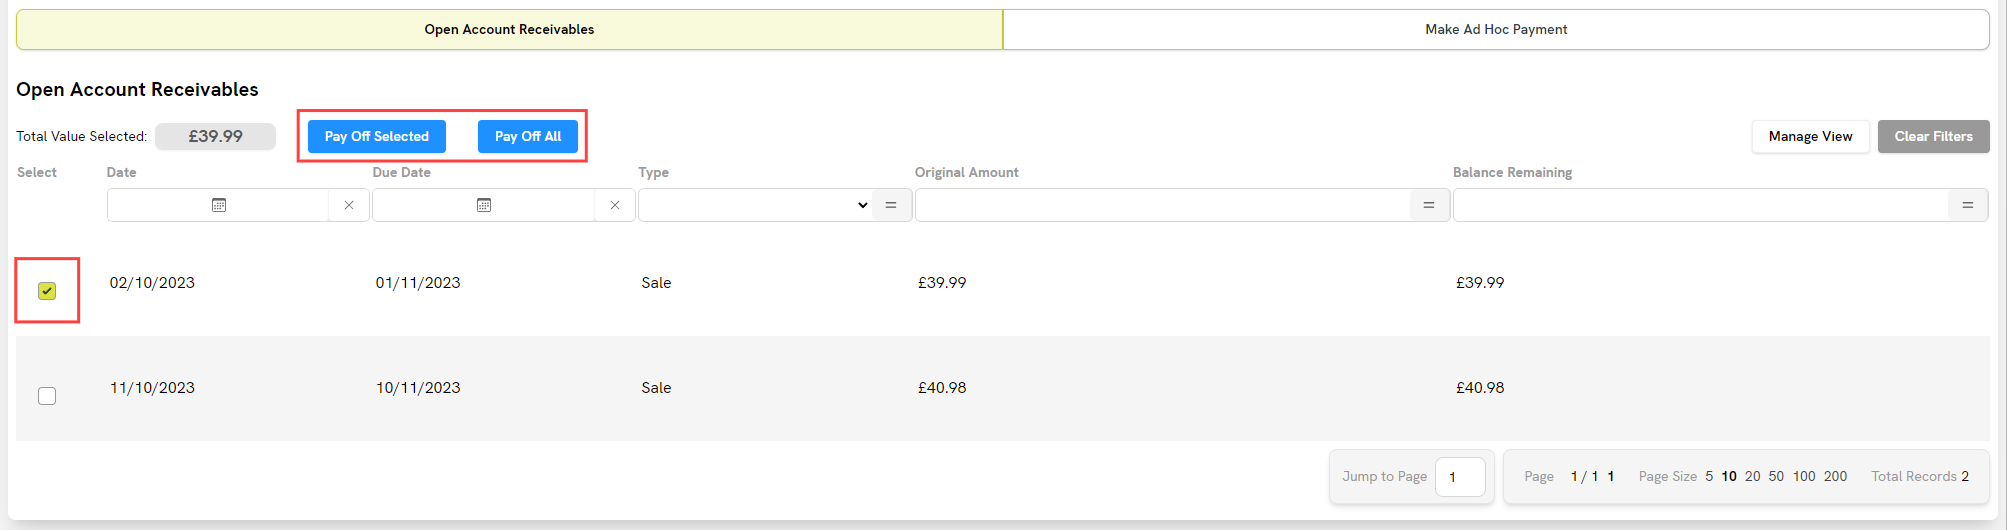
On this screen, you can choose whether your customer would like to make a payment against specific Account Receivables or make an ad hoc payment amount towards their balance. These options are represented by the two buttons shown here:

Open Account Receivables: This is used if the customer wishes to settle one or more specific transaction. Use the tick boxes on the left to make your selection. You can select one or more receivables. To proceed, click the blue button Pay Off Selected.
If the customer is settling all their open receivables today, use the blue Pay Off All button to quickly select all available boxes.
Made Ad Hoc Payment: This is used if the customer wishes to make an ad hoc payment against their account. Enter the chosen amount into the Amount to Pay field. Click Pay Ad Hoc Amount onto Account to proceed.

Once you have proceeded through one of these flows, you will see an ‘Account Repayment’ item has been added to the transaction. If you have selected multiple receivables, there will be an ‘Account Repayment’ item for each receivable.
If you need to make a partial payment against a receivable, you can do this by editing the Price field of that line.

Click Tender.
You can now choose the tender type(s) the customer is using to make their payment. Please note that Customer Account will not be available as a tender.
Once your transaction has been completed, the Customer Account balance will reduce. You will see the payment reflected in the Account Transactions area of the customer's record in the Back Office.
Tendering a return to Customer Account
You may wish to return a customer's purchase using their Customer Account, instead of giving them their money back in the form of a cash / card refund, for example. This will add credit to the account, which the customer can use for future purchases. Some stores will have a policy where purchases over a certain value, or purchases of particular item types, are only returnable in the form of Customer Account credit (store credit).
To process a return in this way, you can begin by following the usual returns process, as documented here.
Once you reach the Tender Transaction screen, you will see the amount to be refunded showing in the top-right. You can select Customer Account as the tender type, as shown:
Click Continue with Transaction to proceed.
Select your receipt options, and then click Complete Transaction.
The value of the refund has now been added to the Customer Account balance. If the customer already had an amount owing on their account, this owing amount will have reduced. If their previous account balance was 0.00, or a negative amount less than the value of the refund, they will now be in possession of store credit.
You can view your refund on the customer's record in the Cloud POS Back Office. Navigate to their record, scroll down to the Account Transactions section and click on the Activity tab.
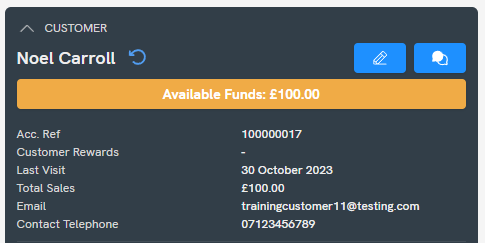
If a customer has credit available to spend in store, this will be highlighted in the Point of Sale whenever they are set as the customer. This is seen in the transaction summary panel:
Generating statements for Customer Accounts
You can generate an account statement for a customer to show their amount owing and the age of their debt. Statements can also be generated in bulk.
Usually, you would email or print an account statement for all customers at the beginning or end of each month.
This process takes place in the Cloud POS Back Office. Please refer to the following article for guidance:
How do I create customer account statements?
Frequently Asked Questions
Can I manually adjust a Customer Account balance?
Yes. Navigate to the customer's record in the Back Office and scroll down to the Account Transactions section. Below the grid in the ‘Receivables’ tab, you will see a button to ‘Adjust’ the account:
This will open a separate window. Select to ‘Credit' or ‘Debit’ the account. You then need to enter the ‘Amount of Adjustment’. You can add a ‘Comment’ if needed. Here is an example:
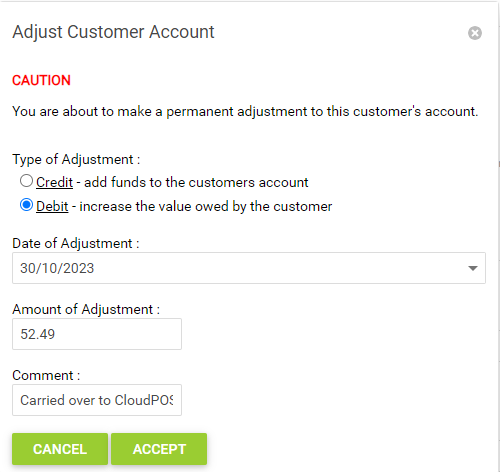
Click ‘Accept’ to save your changes. You will be able to view your adjustment in the ‘Activity' tab.
Caution - Adding Credit
This functionality should be used carefully. You are adding available funds to the customer account, without taking any money from them through the Point of Sale.
Can a customer use Customer Rewards points to pay off their account?
No, this is not possible. When making a payment against a customer account, the ‘Redeem’ button for Customer Rewards will be greyed out.
How can I report on Customer Account activity?
There are three reports in Cloud Reports that relate to Customer Account activity and balances.
‘Accounts - Outstanding Credit/Debit Report’: This report shows you all the transactions that have been tendered to Customer Account, along with the outstanding balance and age of debt.
‘Customer Accounts with Balances’: This report shows all Customer Accounts with a credit/debit balance. If the account balance is 0.00, it will not appear in this report. Customer Accounts with an owing balance are highlighted in red.
‘Account Payment History Report’: This report shows all the activity on your Customer Accounts, including transactions tendered to account, payments made against accounts and manual adjustments in the Back Office.
